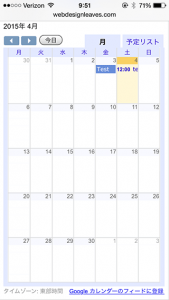
Google カレンダーをウェブサイトに埋め込んでレスポンシブ対応にする方法のメモ。
目次
ウェブサイトに埋め込む
ウェブサイトに埋め込む(https://support.google.com/)
Google ID を取得してすでにカレンダーを利用していることを前提。
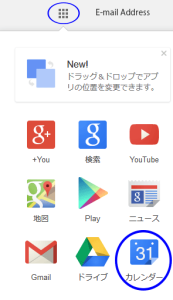
Google カレンダーにログイン(下の画像)
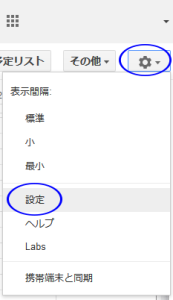
右上の歯車のような(設定の)アイコンをクリックして「設定」を選択(下の画像)
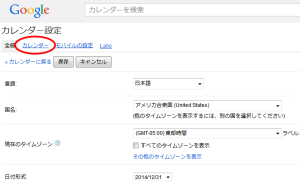
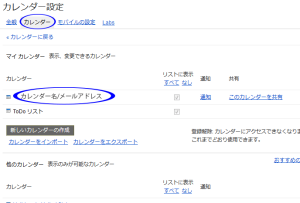
以下のような画面が表示される。
左上の「カレンダー」のタブをクリック。(上の画像)
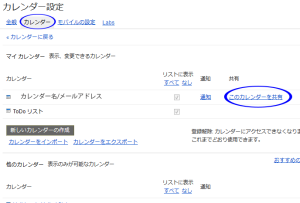
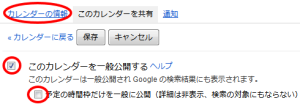
カレンダーを誰でも閲覧できるようにするには、カレンダーを一般公開する必要があるので、(上の画像)「共有」の下の「このカレンダーを共有」をクリックして、表示される画面(下の画像)で「このカレンダーを一般公開する」にチェックを入れて保存(詳細を非表示にするにはその下のチェックボックスにもチェックを入れる)。
カレンダーを一般公開する(https://support.google.com/)
左上の「カレンダーの情報」をクリック(上の画像)
「カレンダーに戻る」を選択した場合、カレンダーの画面に移動するので再度「設定」→「カレンダー」タブをクリックして表示するカレンダーを選択(下の画像)
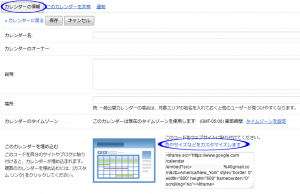
「カレンダーの情報」の画面(下の画像)
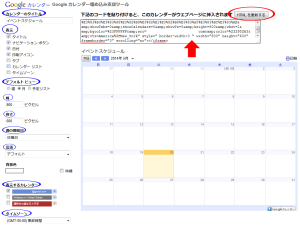
「色やサイズなどをカスタマイズします」というリンクをクリックすると「Google カレンダー埋め込み支援ツール」が表示されるので、以下の項目を設定。但し、カレンダーの枠の色などの指定はできないみたい(そのためのプラグインはある)。
- カレンダーのタイトル
- 表示
- デフォルト ビュー
- 幅
- 高さ
- 週の開始日
- 言語
- 背景色(タイトル等上部の背景色)
- 枠線
- 表示するカレンダー
- タイムゾーン
設定が終わったら、右上の「HTML を更新する」をクリックして、その下のコードをコピーして、カレンダーを表示するページに貼り付ける。
レスポンシブ対応に
追加情報
スマートフォン でもカレンダー全体が表示されるようにするには、次項「スマートフォン 対応に」を参照ください。(2015/4/4)
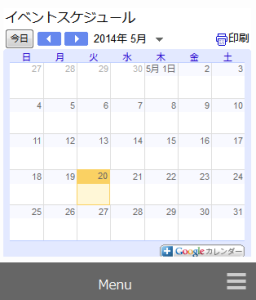
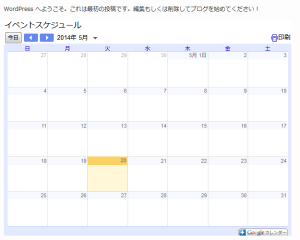
レスポンシブ対応にするには、コピーしたコード(iframe 要素)を2つの div 要素で囲む必要がある。
基本的な構造の HTML
<div class="cal_wrapper">
    <div class="googlecal">
      <!-- Google カレンダー埋め込み用 HTML コードをペースト -->
    </div><!--end of .googlecal-->
</div><!--end of .cal_wrapper-->
この例ではそれぞれの div 要素に「cal_wrapper」と「googlecal」というクラスを指定(何でも良い)。
<div class="cal_wrapper">
  <div class="googlecal">
    <!-- 埋め込み用 HTML コード -->
    <iframe src="https://www.google.com/calendar/embed?title=中略k" style=" border-width:0 " width="800" height="600" frameborder="0" scrolling="no"></iframe>
  </div><!--end of .googlecal-->
</div><!--end of .cal_wrapper-->
div 要素のクラスを使って以下のようにスタイルを指定。パディングやマージン、最大幅、縦横比などはサイトのデザイン等によって調整。
以下の例は600px 以上では縦横比を「3:4」、600px未満では「3:3」にする例。
.cal_wrapper {
  max-width: 800px; /* 最大幅 */
  min-width: 300px; /* 最小幅 */
  margin: 2.0833% auto;
}

.googlecal {
  position: relative;
  padding-bottom: 100%; /* 縦横比 */
  height: 0;
  overflow: hidden;
}
.googlecal iframe {
  position: absolute;
  top: 0;
  left: 0;
  width: 100% !important;
  height: 100% !important;
}

@media only screen and (min-width: 600px) {
  /* 画面幅が600px以上の場合の縦横比の指定 */
  .googlecal {
    padding-bottom: 75%;
  }
}
.cal_wrapper
カレンダー全体のレイアウト用(必須ではない)
最大及び最小幅を指定
上下マージンを 2.0833% にして中央寄せ
.googlecal
position: relative
子要素の基準とする
padding-bottom: 75%
縦横比:幅の 75% を高さとする場合(800px X 600px → 600 ÷ 800 x 100 = 75% )
height: 0
古い IE のレイアウト用の指定(おそらく)
.googlecal iframe
position: absolute
親要素(.googlemap)のパディング領域に配置するために、絶対配置を指定
top: 0
トップに配置
left: 0
左に配置
width: 100% !important
親コンテナの幅いっぱいに表示(!importantはなくても大丈夫みたい)
height: 100% !important
親コンテナの高さいっぱいに表示(!importantはなくても大丈夫みたい)
600px 以上の場合
スマートフォン 対応に
追記:2015/4/4
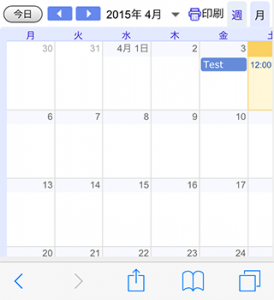
iPhone で見てみると以下のように表示されてしまっていた。
更に、不思議なことに(?)少しずつ縦方向に長くなっていくのを確認。
以下のサイトを参考に少しカスタマイズしたところ、なんとか全体が表示されるようになった。(但し、縦横比をうまく調節できないが。。。)
how-to-embed-a-google-calendar-in-a-responsive-way
HTML
以下は、600px 以上の場合は「.big-container」を表示して、それ以外(600px 以下)は「.small-container」を表示する場合の例。必要に応じてブレークポイントの値を変更したり、さらに別のブレークポイントを設ければいいかと思う。
また、「small-container」の iframe 要素の src 属性内の「embed?」を「htmlembed?」に変更する必要がある。
<div class="gc_wrapper">

        <div class="responsive-iframe-container big-container">
          <!-- 埋め込み用 HTML コード -->
          <iframe src="https://www.google.com/calendar/embed?src=xxxx...." style="border: 0" width="800" height="600" frameborder="0" scrolling="no"></iframe>
        </div><!--end of .responsive-iframe-container big-container-->

        <div class="responsive-iframe-container small-container">
          <!-- 埋め込み用 HTML コード★ embed を htmlembed に変更-->
          <iframe src="https://www.google.com/calendar/htmlembed?src=xxxx...." style="border: 0" width="800" height="600" frameborder="0" scrolling="no"></iframe>
        </div><!--end of .responsive-iframe-container small-container-->

</div><!--end of .gc_wrapper-->
CSS
外側の div 要素「gc_wrapper」はそのサイトのデザインに合わせて適宜変更。
ブレークポイントにより、「big-container」と「small-container」は表示・非表示に設定。
.gc_wrapper {
  max-width: 800px;
  min-width: 300px;
  margin: 2.0833% auto;
}

.responsive-iframe-container {
    position: relative;
    padding-bottom: 56.25%;
    padding-top: 30px;
    height: 0;
    overflow: hidden;
}
.responsive-iframe-container iframe,
.responsive-iframe-container object,
.responsive-iframe-container embed {
    position: absolute;
    top: 0;
    left: 0;
    width: 100%;
    height: 100%;
}

@media (max-width: 600px) {
    .big-container {
        display: none;
    }
    .small-container {
       padding-bottom: 200%;   /* 高さ */
    }
}
@media (min-width: 600px) {
    .small-container {
        display: none;
    }
}
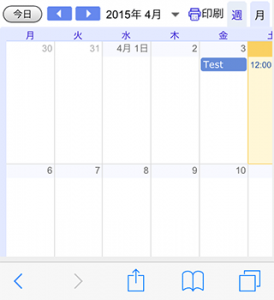
この方法だと以下のように表示される。
WordPress を使っているなら、以下のようなカレンダーのプラグインの方が扱いやすいかと思う。
