 jQuery プラグイン Wookmark の使い方や設定
2015年1月2日
jQuery プラグイン Wookmark の使い方や設定に関する個人的なメモ。
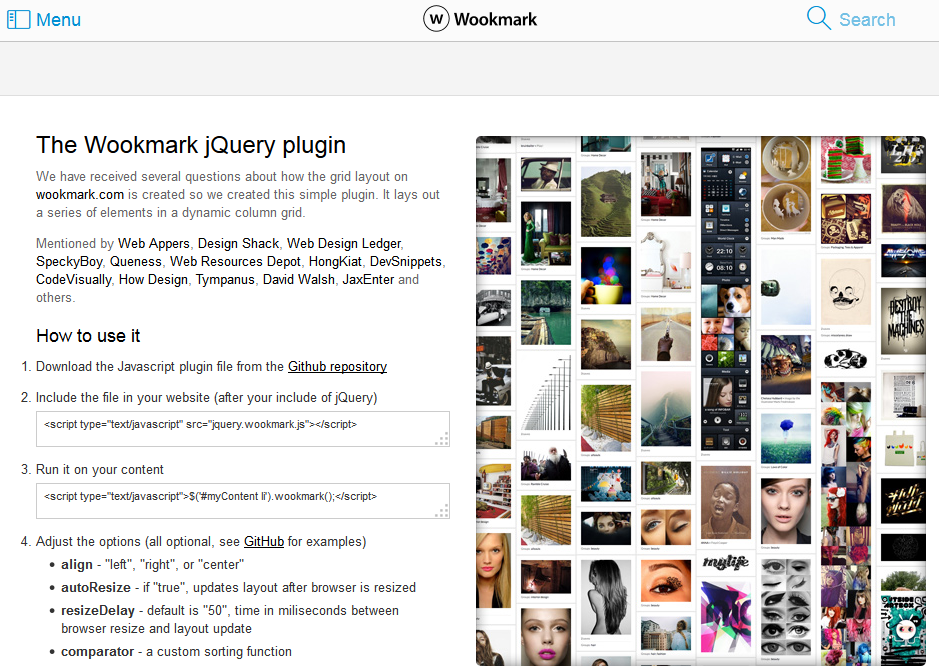
Wookmark は高さの異なる要素をタイル状に隙間なく並べてくれるプラグイン。但し、基本的に幅は一定にする必要があるみたい。
似たようなプラグインで jQuery Masonry があり、これは幅が異なってもそれなりにうまく並べてくれる(幅の設定の方法による)が、Wookmark はフィルターやソートの機能を持っている。
- ライセンス:MIT
- この時点でのバージョン: 1.4.8
- Wookmark のページ:http://www.wookmark.com/jquery-plugin
- Wookmark のダウンロードページ:https://github.com/GBKS/Wookmark-jQuery
関連ページ:「jQuery プラグイン Masonry の使い方と設定」
目次
jQuery プラグイン Wookmark のダウンロード
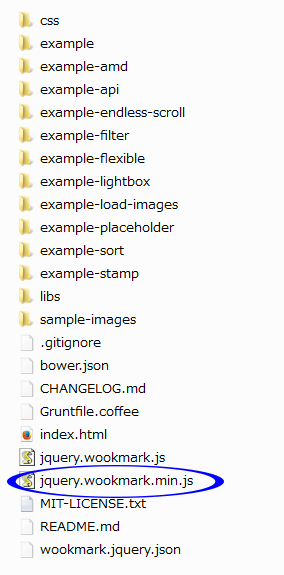
Wookmark のダウンロードページの右側の「Download ZIP」をクリックしてダウンロード。
解凍すると以下のようなファイルやフォルダがある。jQuery プラグイン Wookmark を使用するのに必要なファイルは「jquery.wookmark.min.js」。その他いくつかのサンプルがあるので参考になる。
jQuery プラグイン Wookmark の読み込み
head 内や body の閉じタグの直前等で jQuery と「jquery.wookmark.min.js」を読み込む。パスは環境に合わせて変更。
<script src="http://code.jquery.com/jquery-1.10.1.min.js"></script>
<script src="js/jquery.wookmark.min.js"></script>
jQuery プラグイン Wookmark の基本的な使い方
HTML
- Wookmark で表示するアイテムを任意の id を設定した div 要素(コンテナ)で囲んで記述。
- Wookmark で表示するそれぞれのアイテムは、ul li要素や div 要素で記述してその中に img 要素や p 要素等を記述。
- img 要素には width, height を設定する方が良いみたい(この例では設定しなくても大丈夫だったけど、サンプルには指定してある)
以下は div 要素で記述する例。
- Wookmark で表示するアイテムを囲むコンテナ:div id=”container”
- Wookmark で表示するそれぞれのアイテム:div class=”item”
<div id="wrapper">
    <div id="container">
        <div class="item"><img src="images/001.jpg"  alt="">
            <p>title 1</p>
        </div>
        <div class="item"><img src="images/002.jpg" alt="">
            <p>title 2</p>
        </div>
        ・・・
    </div>
</div>
CSS
- Wookmark で表示するアイテムを囲むコンテナ(#container)には、「position: relative」を設定。
- また中央寄せするには「margin: 0 auto;」等を設定。
- Wookmark で表示するそれぞれのアイテム(.item )のマージンは、この CSS で設定するのではなく、Wookmark のオプション「offset」で設定するみたい。またオプションの「itemWidth」を設定することで、列の幅を調整可能。
- リサイズした場合にアニメーションさせるにはアイテム(.item )に「transition」を設定
#wrapper {
  position: relative;
  max-width: 1080px;
  margin: 0 auto;
}
#container {
  width: 100%;
  margin: 0 auto;
  position: relative;
}
.item {
  /*margin: 0 10px;*/
  width: 140px;
  padding: 8px;
  border: 1px solid #eee;
  -webkit-transition: all 0.3s ease-out;
  -moz-transition: all 0.3s ease-out;
  -o-transition: all 0.3s ease-out;
  transition: all 0.3s ease-out;
}
.item img {
  width: 100%;
}
.item p {
  text-align: center;
  margin: 5px auto;
  font-size: 12px;
  color: #999999;
}
/* fillEmptySpace を設定した場合に追加される要素  */
.wookmark-placeholder {
  background-color: #efefef;
}
jQuery
Wookmark のオプションを設定して、対象となるアイテム(この例では .item )で Wookmark をイニシャライズ。
<script src="http://code.jquery.com/jquery-1.10.1.min.js"></script>
<script src="js/jquery.wookmark.min.js"></script>
<script>
jQuery(function($){
    var options = {
        // レイアウトのオプション
        autoResize: true, // リサイズ時にレイアウトを更新
        container: $('#container'), //コンテナを指定(CSS の設定で中央寄せ等する場合必要)
        //itemWidth: 180, // 列の幅の指定(オプション)
        offset: 5, //アイテム間のマージン(オプション)
        outerOffset: 10, // コンテナからのオフセット(オプション)
        fillEmptySpace: true // 最後の空いたスペースを「.wookmark-placeholder」で埋める(オプション)
    };
    $('.item').wookmark(options);
});
</script>
imagesLoaded プラグインの使用
うまく動作しない場合は、imagesLoaded プラグインを使用してみるといいかもしれない。imagesLoaded プラグインは、画像が読み込まれたら実効する処理がある場合に利用できる。ダウンロードした「libs」フォルダの中にすでに入っている(jquery.imagesloaded.js)のでそれを読み込み、以下のように jQuery の記述を変更。
<script src="http://code.jquery.com/jquery-1.10.1.min.js"></script>
<script src="js/jquery.wookmark.min.js"></script>
<script src="js/jquery.imagesloaded.js"></script>
<script>
jQuery(function($){
    var $item = $('.item');
    $item.imagesLoaded(function() {
        var options = {
            // レイアウトのオプション
            autoResize: true, // リサイズ時にレイアウトを更新
            container: $('#container'), //コンテナを指定
            //itemWidth: 180, // 列の幅の指定(オプション)
            offset: 5, //アイテム間のマージン(オプション)
            outerOffset: 10, // コンテナからのオフセット(オプション)
            fillEmptySpace: true // (オプション)
        };
        $item .wookmark(options);
    });
});
</script>
imagesLoaded プラグインの最新版は以下のサイトからダウンロード可能。また、圧縮版(imagesloaded.pkgd.min.js)もあるので実環境ではそちらの方がいいと思う。
https://github.com/desandro/imagesloaded
Wookmark のフィルター機能
いくつかのフィルター機能のサンプルがダウンロードした「example-filter」フォルダ内にある。
基本的なフィルター機能
フィルタのリンクをクリックすると、それに該当するもののみが表示され、再度クリックすると全てが表示される。
ダウンロードした「example-filter」フォルダ内の「only-filter.html」がサンプル。
- ol または ul 要素でフィルターのリストを作成
- フィルターのリストの li 要素に「data-filter」属性を設定し、フィルターの値を指定
- それぞれのアイテムに「data-filter-class」属性を設定し、該当するフィルタの値を配列で指定
HTML
<!-- フィルターのリスト -->
<ul id="filters" class="clearfix">
<li data-filter="newyork">New York</li>
<li data-filter="mexico">Mexico</li>
<li data-filter="rio">Rio</li>
・・・
</ul>
<div id="container">
<div class="item" data-filter-class='["newyork", "art"]'><img src="images/001.jpg" alt="">
<p>title 1</p>
</div>
<div class="item" data-filter-class='["performance"]'><img src="images/002.jpg" alt="">
<p>title 2</p>
</div>
<div class="item" data-filter-class='["mexico", "street", "art"]'><img src="images/003.jpg" alt="">
<p>title 3</p>
</div>
・・・
</div>
CSS では「.item.inactive」というクラスを設定して「visibility: hidden;」「opacity: 0;」を設定する必要がある。
また、フィルターリストのスタイルも設定。
CSS
#container {
  width: 100%;
  margin: 0 auto;
  position: relative;
  overflow: hidden; /*追加*/
}
.item {
  width: 140px;
  padding: 8px;
  border: 1px solid #eee;
}

/*追加 これがないとフィルタした場合に背後に別の画像が表示される*/
.item.inactive {
  visibility: hidden;
  opacity: 0;
}

.item img {
  width: 100%;
}
.item p {
  text-align: center;
  margin: 5px auto;
  font-size: 12px;
  color: #999999;
}

.wookmark-placeholder {
  background-color: #efefef;
}

/**
 * Grid items animation
 */
.item {
  -webkit-transition: all 0.3s ease-out;
     -moz-transition: all 0.3s ease-out;
       -o-transition: all 0.3s ease-out;
          transition: all 0.3s ease-out;
}

.wookmark-placeholder {
  -webkit-transition: all 0.3s ease-out;
     -moz-transition: all 0.3s ease-out;
       -o-transition: all 0.3s ease-out;
          transition: all 0.3s ease-out;
}

/* フィルターリスト */

#filters {
  list-style-type: none;
  text-align: center;
  margin: 0 5% 20px 5%;
}

#filters li {
  font-size: 12px;
  float: left;
  padding: 6px 0 4px 0;
  cursor: pointer;
  margin: 0 1% 0 1%;
  width: 10%;
  -webkit-transition: all 0.15s ease-out;
     -moz-transition: all 0.15s ease-out;
       -o-transition: all 0.15s ease-out;
          transition: all 0.15s ease-out;
  -webkit-border-radius: 3px;
     -moz-border-radius: 3px;
          border-radius: 3px;
}

#filters li:hover {
  background: #4281f5;
  color: #ffffff;
}

#filters li.active {
  background: #4281f5;
  color: #ffffff;
}
jQuery では「imagesLoaded()」を使用するので、ダウンロードした中の「libs」フォルダに入っている「jquery.imagesloaded.js」を読み込む必要がある。
jQuery
<script src="http://code.jquery.com/jquery-1.10.1.min.js"></script>
<script src="js/jquery.wookmark.min.js"></script>
<script src="js/imagesloaded.pkgd.min.js"></script>
<script>
jQuery(function($){

  $('.item').imagesLoaded(function() {
        // Prepare layout options.
        var options = {
          autoResize: true, // This will auto-update the layout when the browser window is resized.
          container: $('#container'), // Optional, used for some extra CSS styling
          offset: 5, // Optional, the distance between grid items
          itemWidth: 165, // Optional, the width of a grid item
          fillEmptySpace: true // Optional, fill the bottom of each column with widths of flexible height
        };

        // Get a reference to your grid items.
        var handler = $('.item'),
            filters = $('#filters li');

        // Call the layout function.
        handler.wookmark(options);

        /**
         * When a filter is clicked, toggle it's active state and refresh.
         */
        var onClickFilter = function(event) {
          var item = $(event.currentTarget),
              activeFilters = [];

          if (!item.hasClass('active')) {
            filters.removeClass('active');
          }
          item.toggleClass('active');

          // Filter by the currently selected filter
          if (item.hasClass('active')) {
            activeFilters.push(item.data('filter'));
          }

          handler.wookmarkInstance.filter(activeFilters);
        }

        // Capture filter click events.
        filters.click(onClickFilter);
      });
});
</script>
フェードフィルタ
フィルターのリンクをクリックすると、それに該当するもの以外がフェード効果で薄く(opacity: .2)表示され、他のリンクをクリックすると追加されていく。
ダウンロードした「example-filter」フォルダ内の「fade.html」がサンプル。
HTML は前述のサンプルと同じ。
CSS では以下(.item.inactive)を変更。
.item.inactive{
      visibility: visible;
      opacity: .2;
      filter: alpha(opacity=20); /* IE 7 and Earlier */
      /* Next 2 lines IE8 */
      -ms-filter: "progid:DXImageTransform.Microsoft.Alpha(Opacity=20)";
      filter: progid:DXImageTransform.Microsoft.Alpha(Opacity=20);
}
jQuery の記述は以下のようになっている。
<script src="http://code.jquery.com/jquery-1.10.1.min.js"></script>
<script src="js/jquery.wookmark.min.js"></script>
<script src="js/jquery.imagesloaded.js"></script>
<script>
jQuery(function($){

  $('.item').imagesLoaded(function() {
        // Prepare layout options.
        var options = {
          autoResize: true, // This will auto-update the layout when the browser window is resized.
          container: $('#container'), // Optional, used for some extra CSS styling
          offset: 5, // Optional, the distance between grid items
          itemWidth: 165, // Optional, the width of a grid item
          fillEmptySpace: true, // Optional, fill the bottom of each column with widths of flexible height
          ignoreInactiveItems: false,
          comparator: function(a, b) {
            return $(a).hasClass('inactive') && !$(b).hasClass('inactive') ? 1 : -1;
          }
        };

        // Get a reference to your grid items.
        var handler = $('.item'),
            filters = $('#filters li');

        // Call the layout function.
        handler.wookmark(options);

        /**
         * When a filter is clicked, toggle it's active state and refresh.
         */
        var onClickFilter = function(event) {
          var item = $(event.currentTarget),
              activeFilters = [];
          item.toggleClass('active');

          // Collect active filter strings
          filters.filter('.active').each(function() {
            activeFilters.push($(this).data('filter'));
          });

          handler.wookmarkInstance.filter(activeFilters, 'or');
        }

        // Capture filter click events.
        filters.click(onClickFilter);
      });
});
</script>
リセット付きフィルター機能
フィルターのリンクをクリックすると、それに該当するものが表示され、他のリンクをクリックすると追加されていく。リセットのリンクをクリックすると全てが表示される。
ダウンロードした「example-filter」フォルダ内の「index.html」がサンプル。
HTML では、フィルタのリストに「Reset filters」の項目を追加。その他は前述の例と同じ。
HTML
<ul id="filters" class="clearfix">
      <li data-filter="all">Reset filters</li><!-- 追加 -->
      <li data-filter="newyork">New York</li>
      <li data-filter="mexico">Mexico</li>
      ・・・
</ul>
CSS は前述の例と同じ。
jQuery の記述は以下のようになっている。
jQuery
<script src="http://code.jquery.com/jquery-1.10.1.min.js"></script>
<script src="js/jquery.wookmark.min.js"></script>
<script src="js/jquery.imagesloaded.js"></script>
<script>
jQuery(function($){

    $('.item').imagesLoaded(function() {
        // Prepare layout options.
        var options = {
          autoResize: true, // This will auto-update the layout when the browser window is resized.
          container: $('#container'), // Optional, used for some extra CSS styling
          offset: 5, // Optional, the distance between grid items
          itemWidth: 165, // Optional, the width of a grid item
          fillEmptySpace: true // Optional, fill the bottom of each column with widths of flexible height
        };

        // Get a reference to your grid items.
        var handler = $('.item'),
            filters = $('#filters li');

        // Call the layout function.
        handler.wookmark(options);

        /**
         * When a filter is clicked, toggle it's active state and refresh.
         */
        function onClickFilter(e) {
          var $item = $(e.currentTarget),
              activeFilters = [],
              filterType = $item.data('filter');

          if (filterType === 'all') {
            filters.removeClass('active');
          } else {
            $item.toggleClass('active');

            // Collect active filter strings
            filters.filter('.active').each(function() {
              activeFilters.push($(this).data('filter'));
            });
          }

          handler.wookmarkInstance.filter(activeFilters, 'or');
        }

        // Capture filter click events.
        $('#filters').on('click.wookmark-filter', 'li', onClickFilter);
      });
});
</script>
Wookmark のソート機能
ソート機能のサンプルはダウンロードした「example-sort」フォルダ内にある。
ソートする項目のボタンをクリックすると、その項目を元にソートする。
- ol または ul 要素でソートする項目(ボタン)のリストを作成
- フィルターのリストの li 要素に「data-sortby」属性を設定し、ソートする項目の値を指定
- またデフォルトのソートに該当するものに「class=”active”」を設定
- それぞれのアイテムに「data-xxxx」属性を設定し、該当するソートする項目の値を指定(xxxx はソートする項目名など)
HTML
<!-- ソートする項目(ボタン)のリスト -->
<ul id="sortbys" class="clearfix">
      <li data-sortby="name" class="active">Name</li>
      <li data-sortby="year">Year</li>
      <li data-sortby="place">Place</li>
</ul>

<div id="container">
  <div class="item" data-name="Axxx" data-year="2011" data-place="New York"><img src="../masonry/images/001.jpg"  alt="">
    <p>Axxx 2011 New York</p>
  </div>
  <div class="item"  data-name="Zxxx" data-year="2008" data-place="Mexico"><img src="../masonry/images/002.jpg" alt="">
    <p>Zxxx 2008 New York</p>
  </div>
  ・・・
</div>
CSS ではソートする項目のボタンのスタイルを追加設定。
/* Sort buttons */
    #sortbys {
      list-style-type: none;
      text-align: center;
      margin: 0 5% 20px 5%;
    }

    #sortbys li {
      font-size: 12px;
      float: left;
      padding: 6px 0 4px 0;
      cursor: pointer;
      margin: 0 1% 0 1%;
      width: 8%;
      -webkit-transition: all 0.15s ease-out;
         -moz-transition: all 0.15s ease-out;
           -o-transition: all 0.15s ease-out;
              transition: all 0.15s ease-out;
      -webkit-border-radius: 3px;
         -moz-border-radius: 3px;
              border-radius: 3px;
    }

    #sortbys li:hover {
      background: #dedede;
    }

    #sortbys li.active {
      background: #333333;
      color: #ffffff;
    }
jQuery の記述は以下のようになる。
この例ではソートの項目を以下の3つ作成している。
data-sortby=”name”
data-sortby=”year”
data-sortby=”place”
function comparatorXXXX(a, b) のようにソートする際の比較をする関数を設定
ソートの項目にあわせて以下の3つの関数を設定
comparatorName(a, b)
comparatorYear(a, b)
comparatorPlace(a, b)
switch の部分も作成したソートの項目の名前を元に変更
case ‘place’:
options.comparator = comparatorPlace;
case ‘year’:
options.comparator = comparatorYear;
case ‘name’:
options.comparator = comparatorName;
<script src="http://code.jquery.com/jquery-1.10.1.min.js"></script>
<script src="js/jquery.wookmark.min.js"></script>
<script src="js/jquery.imagesloaded.js"></script>
<script>
jQuery(function($){

    $('.item').imagesLoaded(function() {

        //カスタマイズ必要
        function comparatorName(a, b) {
            return $(a).data('name') < $(b).data('name') ? -1 : 1;
        }
        function comparatorYear(a, b) {
            return $(a).data('year') < $(b).data('year') ? -1 : 1;
        }
        function comparatorPlace(a, b) {
            return $(a).data('place') < $(b).data('place') ? -1 : 1;
        }

        // Prepare layout options.
        var options = {
            autoResize: true, // This will auto-update the layout when the browser window is resized.
            container: $('#container'), // Optional, used for some extra CSS styling
            offset: 5, // Optional, the distance between grid items
            itemWidth: 165, // Optional, the width of a grid item
            comparator: comparatorName
        };

        // Get a reference to your grid items.
        var $handler = $('.item'),
            $sortbys = $('#sortbys li');

        // Call the layout function.
        $handler.wookmark(options);

        /**
        * When a filter is clicked, toggle it's active state and refresh.
        */
        var onClickSortBy = function(e) {
            e.preventDefault();
            $currentSortby = $(this);
            //カスタマイズ必要
            switch ($currentSortby.data('sortby')) {
                case 'place':
                    options.comparator = comparatorPlace;
                    break;
                case 'year':
                    options.comparator = comparatorYear;
                    break;
                case 'name':
                    default:
                    options.comparator = comparatorName;
                    break;
            }

            $sortbys.removeClass('active');
            $currentSortby.addClass('active');

            $handler.wookmark(options);
        }

        // Capture filter click events.
        $sortbys.click(onClickSortBy);
    });

});
</script>
プラグイン Lazy Load の使用
Wookmark と Lazy Load を組み合わせて使用する例。
画像が多い場合にページに含まれる画像のデータの読み込みを遅らせる(後から読み込ませる)ためのプラグイン Lazy Load の使用を追加してみる。
Lazy Load の使い方や設定は以下を参照ください。
jQuery プラグイン Lazy Load の使い方と設定
Lazy Load を使う場合、画像要素の記述を変更する必要がある。
具体的には、以下のようにする。
- src 属性にダミー画像へのパスを指定
- data-original 属性に実際の画像へのパスを指定
- 高さと幅を指定
- 画像要素に識別するためのクラス(この例では class=”lazy”)を指定
HTML の例
<div id="container">
  <div class="item"><img class="lazy" src="images/dummy.gif" data-original="images/001.jpg"  alt="">
    <p>title 1</p>
  </div>
  <div class="item"><img class="lazy" src="images/dummy.gif" data-original="images/002.jpg" alt="">
    <p>title 2</p>
  </div>
  ・・・
</div>
CSS では、div 要素(class=”item”)に「float: left」を追加。これを追加しないと、画面上に表示されている部分の画像の一部がロードされない場合がある。
.item {
    width: 140px;
    padding: 8px;
    border: 1px solid #eee;
    float: left;  /*Lazy Load 用に追加 */
    -webkit-transition: all 0.3s ease-out;
    -moz-transition: all 0.3s ease-out;
    -o-transition: all 0.3s ease-out;
    transition: all 0.3s ease-out;
}
jQuery では画像が重なってしまうための対応として、wookmark のイニシャライズを関数(wookmark_update)にして、$(‘img.lazy’).load で実行。
jQuery
<script src="http://code.jquery.com/jquery-1.10.1.min.js"></script>
<script src="js/jquery.lazyload.min.js"></script>
<script src="js/jquery.wookmark.min.js"></script>
<script src="js/jquery.imagesloaded.js"></script>
<script>
jQuery(function($){

    //この部分が lazyload のイニシャライズ
    $("img.lazy").lazyload({
        effect: 'fadeIn',
        effectspeed: 700,
        threshold: 100
    });

    //画像が重なってしまうための対処
    $('img.lazy').load(function() {
        wookmark_update();
    });

    function wookmark_update() {
        var options = {
            autoResize: true,
            container: $('#container'),
            offset: 10,
            outerOffset: 10,
            fillEmptySpace: true
        };
        $('.item').wookmark(options);
    }
});
</script>
wookmark のイニシャライズを関数(wookmark_update)にする際に「imagesLoaded」を使う場合。
function wookmark_update() {
    var $item = $('.item');
    $item.imagesLoaded(function() {
        var options = {
            autoResize: true,
            container: $('#container'),
            offset: 5,
            outerOffset: 10,
            fillEmptySpace: true
        };

        $item.wookmark(options);
    });

}
高さを変更する例
ダウンロードした「example-load-images」フォルダ内に高さをランダムに変更するサンプルが入っている。
この例は以下のような構造の HTML で、アイテム(.item)内の p 要素を最初は非表示にしておき、クリックすると p 要素を表示する場合。
<div id="container">
  <div class="item"><img src="images/001.jpg"  alt="">
    <p>Lorem ipsum dolor sit amet</p>
  </div>
  <div class="item"><img src="images/002.jpg" alt="">
    <p>consectetur adipisicing elit</p>
  </div>
CSS で p 要素を非表示にしておく。
#container {
  width: 100%;
  margin: 0 auto;
  position: relative;
}
.item {
  width: 140px;
  padding: 8px;
  border: 1px solid #eee;
  -webkit-transition: all 0.3s ease-out;
  -moz-transition: all 0.3s ease-out;
  -o-transition: all 0.3s ease-out;
  transition: all 0.3s ease-out;
  cursor: pointer; /*カーソルを変更*/
}
.item img {
  width: 100%;
}
.item p {
  text-align: center;
  margin: 5px auto;
  font-size: 12px;
  color: #999999;
  display: none; /*非表示に*/
}
jQuery では、アイテムをクリックしたら、p 要素をトグルで表示・非表示を切り替える。その後、レイアウトをアップデートする。
<script src="http://code.jquery.com/jquery-1.10.1.min.js"></script>
<script src="js/jquery.wookmark.min.js"></script>
<script src="js/jquery.imagesloaded.js"></script>
<script>
jQuery(function($){
    var $item = $('.item');
    $item.imagesLoaded(function() {
        var options = {
            autoResize: true,
            container: $('#container'),
            offset: 5,
            outerOffset: 10
        };
        $item.wookmark(options);

        $item.click(function(){
            $('img', this).closest('div').find('p').toggle();
            //レイアウトをアップデート
            $item.wookmark();
        });
    });
});
</script>
New Web 制作リファレンス
![]()