 jQuery lightGallery の使い方や設定
2014年12月30日
追加情報
Version 1.2.x については「 jQuery lightGallery (Version 1.2.x) の使い方や設定」をご覧ください。
jQuery LightBox 系プラグイン lightGallery の基本的な使い方や設定に関する個人的なメモ。この時点での lightGallery のバージョンは「Version 1.1.4」。
- ライセンス:MIT License
- レスポンシブ対応
- Youtube Vimeo Video and html5 videos 対応
- Slide and Fade アニメーション
- iframe 対応
目次
jQuery lightGallery のダウンロード
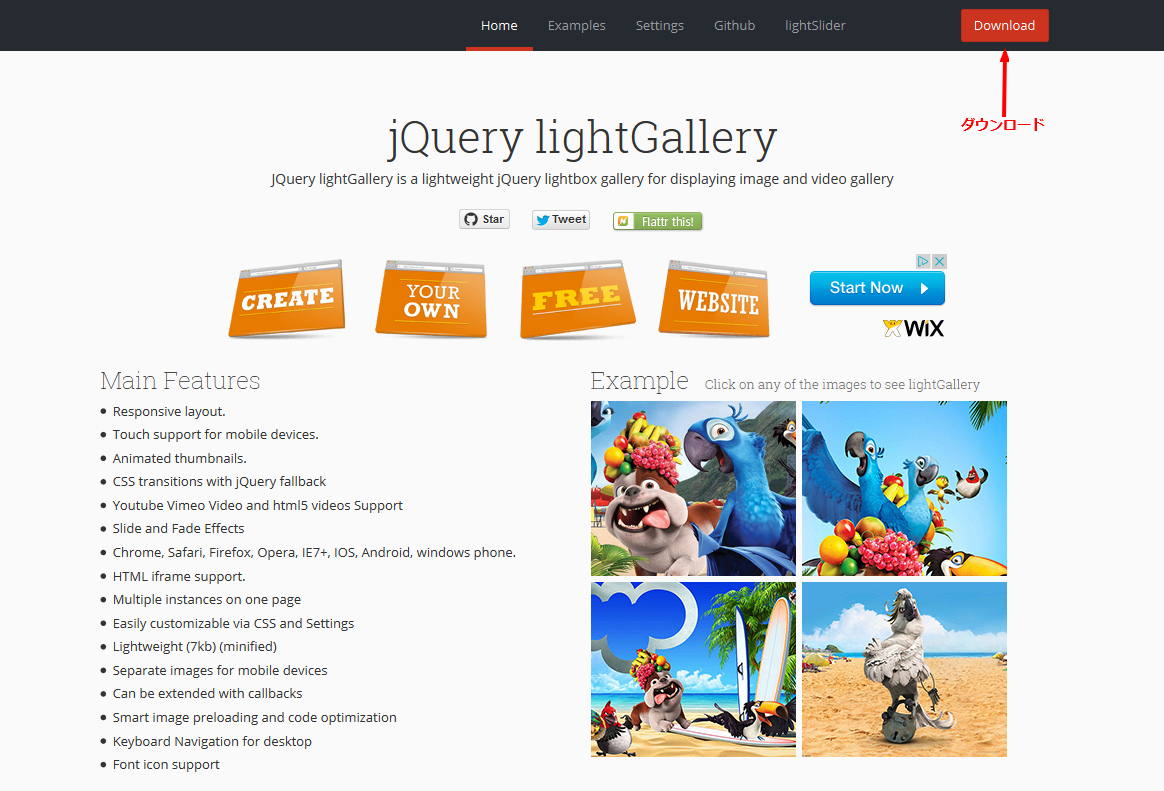
jQuery lightGallery のページの上部メニュー右側にある「Download」をクリックしてダウンロード。時々紛らわしい広告が表示されている場合があるので注意。

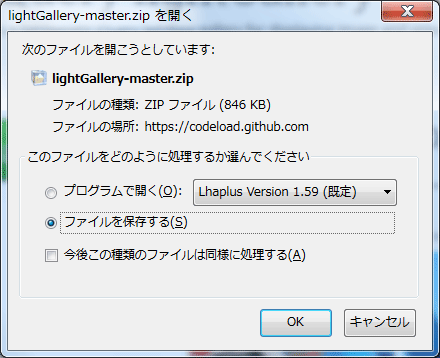
以下のようなウィンドウがポップアップするので、適当なところに保存。
ダウンロードしたファイルを解凍すると以下のようなファイルやフォルダがある。
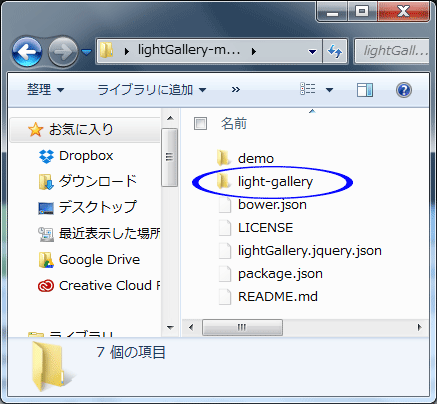
「light-gallery」というフォルダを適当なところに配置。「light-gallery」フォルダの中には「css」「fonts」「img」「js」というフォルダがあり、必要なファイル等が入っている。
jQuery lightGallery の読み込み
以下のように head 内等で「lightGallery.css」「jquery」「lightGallery.min.js」を読み込む。jQuery が必要なので読み込むのを忘れないように。
パスは環境に合わせて変更。以下は「light-gallery」フォルダをトップレベルに配置した場合の例。
<link type="text/css" rel="stylesheet" href="light-gallery/css/lightGallery.css" />
<script src="http://code.jquery.com/jquery-1.10.1.min.js"></script>
<script src="light-gallery/js/lightGallery.min.js"></script>
jQuery lightGallery の HTML の記述
- ul と li 要素を使ってマークアップ。(他の要素でも問題ないと思うが)
- li 要素の「data-src」属性に lightGallery を使って表示する画像のパスを設定。
- ul 要素には任意の id 属性を付けておく(何でもよい)。イニシャライズの際にその id を指定。
以下はサムネイル画像は「images/thumbs」に、lightGallery を使って表示する画像は「images」保存してある場合の例。
<ul id="lightGallery">
    <li data-src="images/img1.jpg">
        <img src="images/thumbs/thumb1.jpg" />
    </li>
    <li data-src="images/img2.jpg">
        <img src="images/thumbs/thumb2.jpg" />
    </li>
    ...
</ul>
jQuery lightGallery のイニシャライズ(呼び出し)
以下のように ul 要素の id 属性を指定してイニシャライズ。
<script type="text/javascript">
jQuery(function($){
    $("#lightGallery").lightGallery();
});
</script>
これで lightGallery を使って表示することができる。デフォルトのままだと、以下のサンプルのように画面下の矢印の間のアイコンをクリックするとサムネイルリストが表示されるようになっている。
上記のサンプルでは、以下の CSS を設定してオーバーレイの透明度の変更、サムネイルにマウスオーバーした際のカーソルの形状を変更。
ul#lightGallery li:hover {
  cursor: pointer;
}

#lightGallery-outer{
  background-color: rgba(0, 0, 0, 0.6);
}
レスポンシブ用画像の指定
ブラウザの幅が一定以下の場合に、lightGallery で表示する画像を異なるものに指定可能。
HTML の記述で、「data-responsive-src」属性を使ってモバイルデバイス用の画像を指定できる。以下はモバイルデバイス用の画像を「images/mobile」フォルダに保存してある場合の例。
<ul id="lightGallery">
      <li data-src="images/1.jpg" data-responsive-src="images/mobile/1.jpg">
        <img src="images/thumbs/1.jpg"/>
      </li>
        <li data-src="images/2.jpg" data-responsive-src="images/mobile/2.jpg">
        <img src="images/thumbs/2.jpg" />
      </li>
      ・・・
初期化の際に「mobileSrc」オプションを「true」に設定。また、「mobileSrcMaxWidth」オプションを使って「mobileSrc」オプションを適用する画面幅の最大値を設定可能(デフォルトは 640)
<script>
jQuery(function($){
    $('#lightGallery').lightGallery({
        mobileSrc: true,
        mobileSrcMaxWidth : 600
    });
});
</script>
サムネイルリストの表示
最初からサムネイルのリストを画面下に表示する例。HTML の構造は同じ。
初期化する際のオプションの指定と CSS の設定の追加を行う。
jQuery
最初からサムネイルのリストを画面下に表示するには「showThumbByDefault」を「true」に設定。
また矢印をクリックして最後の画像の次は最初の画像が表示されるように「loop」も「true」に設定(好みの問題)。
<script>
jQuery(function($){
  $('#lightGallery').lightGallery({
    showThumbByDefault:true,
    loop:true
  });
});
</script>
CSS
jQuery lightGallery の Examples ページにある「Gallery with animated thumbnails」を参考。
Examples ページでは初期化の際に「addClass:’showThumbByDefault’」というオプションを指定して、「showThumbByDefault」というクラスを追加しているが、この例ではこのクラスは追加していない。
#lightGallery-Gallery.open .lightGallery-slide {
    padding-bottom: 120px;
}
#lightGallery-Gallery .thumb_cont .thumb_info{
  display:none;
}

#lightGallery-action {
  position: static;
}
#lightGallery-action a {
  margin-top: -14px !important;
  position: absolute;
  top: 50%;
  z-index: 9999999;
  background-color: transparent;
  font-size: 28px;
}
#lightGallery-action a#lightGallery-prev {
  left: 17px;
}
#lightGallery-action a#lightGallery-prev:hover {
  background: none;
}
#lightGallery-action a#lightGallery-next {
  right: 17px;
}
#lightGallery-action a#lightGallery-next:hover {
  background: none;
}
.localVideo #lightGallery-action {
  position: static;
}
#lightGallery-Gallery .lightGallery-slide .object{
  transform: scale3d(1, 1, 1) !important;
  -moz-transform: scale3d(1, 1, 1) !important;
  -ms-transform: scale3d(1, 1, 1) !important;
  -webkit-transform: scale3d(1, 1, 1) !important;
  -o-transform: scale3d(1, 1, 1) !important;
}
このままでも、画像が全て横長の場合はそれほど問題はないが縦長の画像がある場合などは、画像の一部がサムネイルに隠れてしまうので、以下の設定を追加。
#lightGallery-slider .lightGallery-slide img{
  max-height: 80% !important;
  margin-top: -10%;
}
更に画像に枠線(ボーダー)を付けてみた。
.current img {
  padding: 4px !important;
  background-color: #fff !important;
  -webkit-border-radius: 2px;
  -moz-border-radius: 2px;
  -ms-border-radius: 2px;
  -o-border-radius: 2px;
  border-radius: 2px ;
}
スライドショー
スライドショーを自動的に開始するにはオプションの「auto」を「true」に設定して初期化する。
サムネイルをクリックしたり、矢印のアイコンをクリックすると自動的に停止する仕様みたい。
<script>
jQuery(function($){
    $('#lightGallery1').lightGallery({
        loop:true,
        auto:true  //スライドショーを自動的に開始
    });
});
</script>
Easing(イージング)の設定
CSS の Easing の指定が可能。
初期化の際に「cssEasing」のオプションで cubic-bezier 関数の値を使って指定できる。
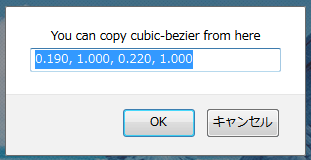
lightGallery の Examples ページにある「Gallery With Easing」のサンプルをクリックして、左上のプルダウンで Easing を選択すると cubic-bezier の値を取得できる。
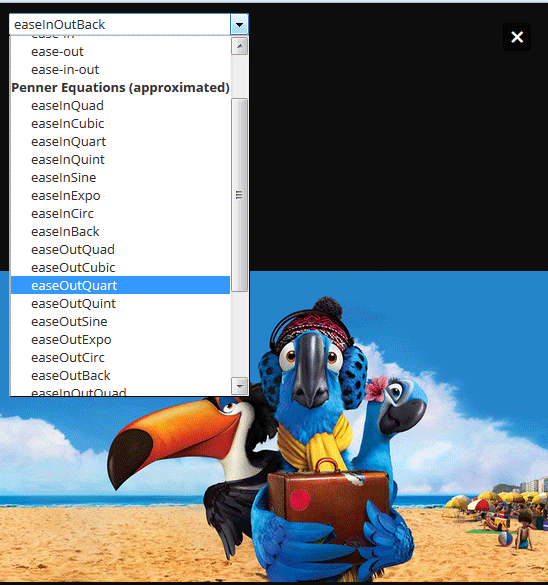
以下のように表示されるので、値をコピーする。
または以下のページからも cubic-bezier の値を取得可能。
取得した値を「cssEasing」のオプションで指定する。
<script>
jQuery(function($){
  $('#lightGallery').lightGallery({
    showThumbByDefault:true,
    loop:true,
    cssEasing:'cubic-bezier(0.68, -0.55, 0.265, 1.55)'
  });
});
</script>
タイトルの表示
lightGallery でタイトルを表示するには「data-sub-html」属性を利用するみたい。
lightGallery の HTML の記述で、li 要素に「data-sub-html」属性を設定して、その値にタイトルを記述。
この時「data-sub-html」属性の値には HTML を記述可能。以下の例では、p 要素にクラスを設定して記述。
HTML
<ul id="lightGallery">
      <li data-src="images/1.jpg" data-sub-html="<p class='desc'>グエル公園から</p>">
        <img src="images/thumbs/1.jpg"/>
      </li>
        <li data-src="images/2.jpg" data-sub-html="<p class='desc'>バルセロナのフラメンコ</p>">
        <img src="images/thumbs/2.jpg" />
      </li>
      ...
</ul>
CSS では、縦長の画像が画面いっぱいに広がらないように max-height で調整。また、矢印の位置やタイトルの色や位置などを調整。
CSS
p.desc {
  color: #ccc;
  margin-top: 0;
  padding-top: 10px;
}

.current img {
  padding: 4px !important;
  background-color: #fff !important;
  border-radius: 2px !important;
}

 #lightGallery-slider .lightGallery-slide img{
  max-height: 85% !important;
}

#photolist ul li:hover {
  cursor: pointer;
}

#lightGallery-outer{
  background-color: rgba(0, 0, 0, 0.6);
}

#lightGallery-Gallery.open .lightGallery-slide {
    padding-bottom: 120px;
}
#lightGallery-Gallery .thumb_cont .thumb_info{
  display:none;
}
/* actions */
#lightGallery-action {
  position: static;
}
#lightGallery-action a {
  margin-top: -14px !important;
  position: absolute;
  top: 50%;
  z-index: 9999999;
  background-color: transparent;
  font-size: 28px;
}
#lightGallery-action a#lightGallery-prev {
  left: 17px;
}
#lightGallery-action a#lightGallery-prev:hover {
  background: none;
}
#lightGallery-action a#lightGallery-next {
  right: 17px;
}
#lightGallery-action a#lightGallery-next:hover {
  background: none;
}
.localVideo #lightGallery-action {
  position: static;
}
#lightGallery-Gallery .lightGallery-slide .object{
  transform: scale3d(1, 1, 1) !important;
  -moz-transform: scale3d(1, 1, 1) !important;
  -ms-transform: scale3d(1, 1, 1) !important;
  -webkit-transform: scale3d(1, 1, 1) !important;
  -o-transform: scale3d(1, 1, 1) !important;
}
初期化では、サムネイルリストを非表示に設定してみた。
<script>
jQuery(function($){
  $('#lightGallery').lightGallery({
    loop:true,
    showThumbByDefault:false
  });
});
</script>
画面上部へのタイトル等(HTML)の表示
lightGallery の CSS に以下のような「customHtml」の設定があり、これを利用する。必要に応じてこれを上書きすればスタイルを変更可能。
.customHtml {
  background: none repeat scroll 0 0 black;
  background: none repeat scroll 0 0 rgba(0, 0, 0, 0.75);
  color: #fff;
  font-family: Arial, sans-serif;
  height: 70px;
  left: 0;
  position: absolute;
  right: 0;
  top: 0;
  z-index: 9;
}
.customHtml p {
  font-size: 14px;
}
.customHtml > h4 {
  font-family: Arial, sans-serif;
  font-weight: bold;
  margin-bottom: 5px;
  margin-top: 15px;
}
タイトルなど表示したい HTML は div 要素(display:none に設定)に記述し、その div 要素の id を「data-sub-html」属性の値に指定。
HTML
<ul id="lightGallery">
      <li data-src="images/1.jpg" data-sub-html="#title1">
        <img src="images/thumbs/1.jpg"/>
      </li>
        <li data-src="images/2.jpg" data-sub-html="#title2">
        <img src="images/thumbs/2.jpg" />
      </li>
      ・・・

</ul>
・・・
<!-- 表示したい HTML を記述 -->
<div id="title1" style="display:none"><!-- id を設定 -->
  <div class="customHtml"><!-- クラス customHtml を設定 -->
    <h4>タイトル</h4>
    <p>その内容などを記述する</p>
  </div>
</div>
<div id="title2" style="display:none">
  <div class="customHtml">
    <h4>Lorem ipsum</h4>
    <p> dolor sit amet, consectetur adipisicing elit.</p>
  </div>
</div>
・・・
CSS でスタイルを調整
.current img {
  padding: 4px !important;
  background-color: #fff !important;
  border-radius: 2px !important;
}

 #lightGallery-slider .lightGallery-slide img{
  max-height: 75% !important;
}

#photolist ul li:hover {
  cursor: pointer;
}

#lightGallery-outer{
  background-color: rgba(0, 0, 0, 0.6);
}
lightGallery を初期化。
<script>
jQuery(function($){
  $('#lightGallery').lightGallery({
    loop:true
  });
});
</script>
Youtube
lightGallery で YouTube の動画を表示するには、「data-src」属性に動画の URL を設定するだけ。
<ul id="video">
    <li data-src="http://www.youtube.com/watch?v=Yk-GTl2JZCc">
        <a href="#"><img src="http://i1.ytimg.com/vi/Yk-GTl2JZCc/hqdefault.jpg" width="200"></a>
    </li>
    <li data-src="http://www.youtube.com/watch?v=jkinLvUrUYE">
        <a href="#"><img src="http://i1.ytimg.com/vi/jkinLvUrUYE/hqdefault.jpg" width="200"></a>
    </li>
</ul>
lightGallery の初期化は、デフォルトのままでも問題なさそう。ビデオ関連のオプションには「videoAutoplay」や「videoMaxWidth」などがある。
<script>
jQuery(function($){
  $('#video').lightGallery();
});
</script>
Google Map / iframe
lightGallery で Google Map を表示するには、「data-src」属性に Google Map の埋め込みコードを設定。
iframe を表示するには、「data-src」属性に URL を設定。
HTML
<h2>Google Map</h2>
<div id="gmap">
    <button id="map" data-iframe="true" data-src="https://www.google.com/maps/embed?pb=!1m14!1m8!1m3!1d6479.273177500845!2d139.81066781349247!3d35.710559560288075!3m2!1i1024!2i768!4f13.1!3m3!1m2!1s0x60188ed0d12f9adf%3A0x7d1d4fb31f43f72a!2z5p2x5Lqs44K544Kr44Kk44OE44Oq44O8!5e0!3m2!1sja!2sjp!4v1419872619501" class="btn btn-primary">Google map</button>
</div>

<h2>iframe</h2>
<div id="iframe_div">
    <button id="iframe" data-iframe="true" data-src="http://webdesignleaves.com" class="btn btn-primary">Iframe </button>
</div>
初期化の際に以下を設定
- オプションの「html」で「true」を指定
- オプションの「thumbnail」で「false」を指定
- オプションの「selector」で要素(セレクタ)の id を指定
- オプションの「videoMaxWidth」で最大幅を指定
<script>
jQuery(function($){
    $('#map').lightGallery({
        html:true,
        thumbnail:false,
        selector:'#map',
        videoMaxWidth:'80%'
    });

    $('#iframe').lightGallery({
        html:true,
        thumbnail:false,
        selector:'#iframe',
        videoMaxWidth:'100%'
    });
});
</script>
New Web 制作リファレンス
![]()