 React の環境構築(セットアップ)
React を使うための環境を構築する方法についての覚書です。CDN を参照して React を使う方法や Create React App を使った環境構築、独自に Bable と webpack を使って環境を構築する方法など。
関連ページ:
作成日:2020年6月23日
React
React は Facebook 社が開発しているユーザインターフェース(UI)構築のための JavaScript ライブラリです。
現在は日本語の公式サイトもあり、チュートリアルや豊富なドキュメントが用意されています。
React 公式サイト: 日本語
React を使うための環境のセットアップ(構築)には大まかに以下のような方法があります。
| 方法 | 説明 | 関連リンク |
|---|---|---|
| CDN を参照 | ビルドツールなどを使わずに HTML に script タグを追加して React の CDN を参照 | 既存のウェブサイトに React を追加する |
| 環境構築ツール を利用 |
目的に合わせた環境構築ツール(Create React App など)を使用。 | 新しい React アプリを作る |
| ゼロから環境を構築 | npm、webpack、babel などを使って独自に環境を構築 | React のページにある参考記事 |
また、React が推奨する環境構築ツール(ツールチェイン)として以下が紹介されています。
| 名前 | 概要 |
|---|---|
| Create React App | 開発環境を構築して最新の JavaScript の機能を使えるようにし、本番環境用の最適化を行う。 Node 8.10以上及び npm 5.6 以上の環境が必要 |
| Next.js | React を使って静的なサイトやサーバサイドでレンダーされるアプリケーションを構築するフレームワーク。サーバ環境として Node.js を利用 |
| Gatsby | React で静的なウェブサイトを作成 |
CDN を参照
本番環境で使用するには実用的ではないかも知れませんが、ビルドツールなどを使わずに手軽に React を使う(試す)方法です。
HTML ファイルに script タグを追加して React の CDN を参照することで HTML ページに React を導入することができます。
以下は React を使って Hello world! と表示する HTML ファイル(index.html)の例です。
</body> の直前(または <heady> 内)で CDN から React を読み込みます。
<!DOCTYPE html>
<html>
<head>
<meta charset="UTF-8" />
<title>Hello React!</title>
</head>
<body>

<!-- コンポーネントを挿入する div 要素-->
<div id="root"></div>

<!-- React 本体と ReactDOM の読み込み -->
<script src="https://unpkg.com/react@16/umd/react.production.min.js" crossorigin></script>
<script src="https://unpkg.com/react-dom@16/umd/react-dom.production.min.js" crossorigin></script>

<script>
//App という名前のコンポーネントを作成
class App extends React.Component {
  render() {
    //Hello world! という内容の h1 要素の  React 要素を作成
    return React.createElement('h1', null, 'Hello world!');
  }
}
//上記 App コンポーネントを div#root に表示
ReactDOM.render(React.createElement(App, null), document.getElementById('root'));
</script>
</body>
</html>
CDN には開発環境用と本番環境用(圧縮版)が用意されています。また、CDN を使って React の機能を提供する場合、crossorigin 属性を設定することが推奨されています。
| ライブラリ | タイプ | CDN(URL) |
|---|---|---|
| React 本体 | 開発用 | https://unpkg.com/react@16/umd/react.development.js |
| 本番用 | https://unpkg.com/react@16/umd/react.production.min.js | |
| ReactDOM | 開発用 | https://unpkg.com/react-dom@16/umd/react-dom.development.js |
| 本番用 | https://unpkg.com/react-dom@16/umd/react-dom.production.min.js | |
| Babel | 圧縮 | https://unpkg.com/babel-standalone@6/babel.min.js |
React : CDN リンク
React : JSX なしで React を使う
JSX を使う
React では殆どの場合、 JSX と呼ばれる JavaScript 構文の拡張を使いますが、JSX はそのままではブラウザが理解できないので Babel というコンパイラを使って JavaScript に変換する必要があります。そのため、React 本体と ReactDOM に加えて Babel を読み込む必要があります。
また、JSX を記述する script タグでは type を "text/babel" とする必要があります。
以下は JSX を使う場合の例です。
<!DOCTYPE html>
<html>
<head>
<meta charset="UTF-8" />
<title>Hello React!</title>
</head>
<body>

<!-- We will put our React component inside this div. -->
<div id="root"></div>

<!-- React 本体と ReactDOM の読み込み -->
<script src="https://unpkg.com/react@16/umd/react.production.min.js" crossorigin></script>
<script src="https://unpkg.com/react-dom@16/umd/react-dom.production.min.js" crossorigin></script>
<!-- Babel の読み込み -->
<script src="https://unpkg.com/babel-standalone@6/babel.min.js"></script>

<!--以下の script 要素は type を text/babel" とする必要があります -->
<script type="text/babel">
//JSX を使った記述
class App extends React.Component {
  render() {
    return <h1>Hello world!</h1>
  }
}

ReactDOM.render(<App />, document.getElementById('root'))
</script>
</body>
</html>
以下は h1 要素のコンポーネントの表示の JSX を外部ファイル(main.jsx)として読み込む例です。
この場合、JSX を記述したファイルの拡張子は .jsx とする必要があります。また、前述同様、読み込む側の script タグでは type を "text/babel" とする必要があります。
但し、この場合 HTML ファイルを表示するにはローカルのサーバ環境(MAMP や XAMPP など)で表示しないとエラー(CORS policy によるブロック)になります。
<!DOCTYPE html>
<html>
<head>
<meta charset="UTF-8" />
<title>Hello React!</title>
</head>
<body>

<div id="root"></div>

<!-- React と Babel の読み込み -->
<script src="https://unpkg.com/react@16/umd/react.production.min.js" crossorigin></script>
<script src="https://unpkg.com/react-dom@16/umd/react-dom.production.min.js" crossorigin></script>
<script src="https://unpkg.com/babel-standalone@6/babel.min.js"></script>

<!-- 外部ファイルとして読み込む -->
<script type="text/babel" src="main.jsx"></script>
</body>
</html>
class App extends React.Component {
  render() {
    return <h1>Hello world!</h1>
  }
}

ReactDOM.render(<App />, document.getElementById('root'))
本番環境で JSX を使う
Babel(babel-standalone)を CDN で読み込むのは学習やシンプルなデモの作成には問題ありませんが、パフォーマンスの面から本番環境には向いてないとされています。
Node.js がインストールされていれば、簡単に Babel をインストールすることができます。
関連ページ:Node.js を Mac にインストール
ターミナルでプロジェクトのディレクトリに移動し、以下の npm コマンドを実行します。
npm init はパッケージのインストールに必要な初期化(設定ファイルの生成)をします。npm init -y を実行すると、デフォルトの値で設定ファイル package.json を生成します。
npm install で必要な Babel のパッケージをインストールします。
//プロジェクトのディレクトリに移動
$ cd /to/myProject   return

// 設定ファイル package.json を生成
$ npm init -y  return

// Babel のパッケージをインストール
$ npm install babel-cli@6 babel-preset-react-app@3 return
index.html では Babel の読み込みを削除し、外部ファイル main.jsx の拡張子を .js に変更します。src フォルダを作成して main.js をコピーしてそこに保存します。
<!DOCTYPE html>
<html>
<head>
<meta charset="UTF-8" />
<title>Hello React!</title>
</head>
<body>

<div id="root"></div>

<!-- React の読み込み -->
<script src="https://unpkg.com/react@16/umd/react.production.min.js" crossorigin></script>
<script src="https://unpkg.com/react-dom@16/umd/react-dom.production.min.js" crossorigin></script>

<!-- main.js の読み込み(拡張子を変更) -->
<script src="main.js"></script>
</body>
</html>
class App extends React.Component {
  render() {
    return <h1>Hello World!</h1>
  }
}

ReactDOM.render(<App />, document.getElementById('root'))
以下のコマンドをターミナルから実行すると、src/main.js を継続的に監視してブラウザでの実行に適した main.js に自動的に変換してくれます。監視を終了するには control + c を押します。
$ npx babel --watch src --out-dir . --presets react-app/prod
.
├── index.html
├── main.js  //自動的に変換されるファイル(index.html で読み込み)
├── package-lock.json
├── package.json
└── src
    └── main.js  //監視対象(こちらを編集)
上記の src/main.js は Babel により以下のように変換されます(途中省略)。
var _createClass = function () { function defineProperties(target, props) { for (var i = 0; i < props.length; i++) { var descriptor = props[i]; descriptor.enumerable = descriptor.enumerable || false;...
        ・・・中略・・・

var App = function (_React$Component) {
  _inherits(App, _React$Component);

  function App() {
    _classCallCheck(this, App);

    return _possibleConstructorReturn(this, (App.__proto__ || Object.getPrototypeOf(App)).apply(this, arguments));
  }

  _createClass(App, [{
    key: 'render',
    value: function render() {
      return React.createElement(
        'h1',
        null,
        'Hello World!'
      );
    }
  }]);

  return App;
}(React.Component);

ReactDOM.render(React.createElement(App, null), document.getElementById('root'));
前述の Babel を起動して監視するコマンドは長いので、package.json の scripts フィールドにコマンド(npm scripts)を記述しておくとショートカットのコマンド(npm run xxxx)で実行できます。
例えば以下のように package.json を編集します。7行目の最後のカンマと8行目が追加した部分です。
{
  "name": "babel",
  "version": "1.0.0",
  "description": "",
  "main": "index.js",
  "scripts": {
    "test": "echo \"Error: no test specified\" && exit 1",
    "watch": "babel --watch src --out-dir . --presets react-app/prod"
  },
  "keywords": [],
  "author": "",
  "license": "ISC",
  "dependencies": {
    "babel-cli": "^6.26.0",
    "babel-preset-react-app": "^3.1.2"
  }
}
上記のように npm scripts を追加すると、プロジェクトのディレクトリで以下のコマンドを実行すれば Babel を起動して監視させることができます。
$ npm run watch  return //Babel を起動
> babel@1.0.0 watch /Applications/MAMP/htdocs/sample/babel
> babel --watch src --out-dir . --presets react-app/prod
src/main.js -> main.js
React : JSX をプロジェクトに追加する
Create React App
Facebook が提供している環境構築ツール Create React App を使うと簡単に React でアプリケーションを作成するための環境を構築することができます。

Create React App はコマンド1つで以下のような機能を含む開発環境を構築してくれます。
- 開発サーバ
- Webpackを使用して React、JSX、ES6 を自動的にコンパイル
- CSS ファイルに自動プレフィックスを付与
- ESLint を使用してコードの誤りをテスト
Create React App を使用するには Node 8.10 以上及び npm 5.6 以上の環境が必要です。
以下のいずれかのコマンドでアプリケーションを作成することができます(実行結果は全て同じ)。
npx create-react-app プロジェクト名
npm init react-app プロジェクト名
yarn create react-app プロジェクト名
Create React App : Getting Started
以下は npx コマンドを使う例(Mac のターミナルでの実行例)です。
アプリケーションをインストールしたい任意のディレクトリ(以下の例では react-sample)に移動して、プロジェクト名(以下の例では my-app)を指定して npx create-react-app コマンドを実行します。
//ディレクトリに移動
$ cd /to/react-sample   return

//npx コマンドでアプリケーションをインストール(環境を構築)
$ npx create-react-app my-app  return

//インストールが開始され以下のようなメッセージが表示される
Creating a new React app in /Applications/MAMP/htdocs/react-sample/my-app.

Installing packages. This might take a couple of minutes.
Installing react, react-dom, and react-scripts with cra-template...

・・・中略・・・

Success! Created my-app at /Applications/MAMP/htdocs/htdocs/react-sample/my-app
Inside that directory, you can run several commands:
  //使用できるコマンド(npm scripts)が表示されている
  npm start
    Starts the development server.

  npm run build
    Bundles the app into static files for production.

  npm test
    Starts the test runner.

  npm run eject
    Removes this tool and copies build dependencies, configuration files
    and scripts into the app directory. If you do this, you can’t go back!

We suggest that you begin by typing:

  cd my-app
  npm start

Happy hacking!
作成したアプリケーションのディレクトリに移動して npm start を実行して開発用サーバを起動します。
//アプリケーションのディレクトリに移動
$ cd my-app  return

//サーバ(development server)を起動
$ npm start  return
以下が表示されて開発用サーバ(webpack-dev-server)が起動し、サンプルで入っているアプリケーションが表示されます。
Compiled successfully!

You can now view my-app in the browser.

  Local:            http://localhost:3000
  On Your Network:  http://192.168.11.6:3000

Note that the development build is not optimized.
To create a production build, use npm run build.
ブラウザが自動的に起動しなければ http://localhost:3000 または 上記に表示されている IP アドレスを使ったローカルアドレスで表示することができます。:3000 はポート番号です。

Create React App の実行で以下のような構成が作成されます。
my-app  //プロジェクトのディレクトリ
├── README.md
├── node_modules //インストールしたパッケージ(モジュール)が入っているディレクトリ
├── package-lock.json
├── package.json //インストールしたパッケージに関する設定ファイル
├── public  //テンプレートの index.html と関連ファイル(初期状態ではサンプルが入っている)
│   ├── favicon.ico  //React のファビコン画像ファイル
│   ├── index.html  //メインの HTML ファイル(テンプレート)
│   ├── logo192.png //React のロゴ画像ファイル
│   ├── logo512.png //React のロゴ画像ファイル
│   ├── manifest.json
│   └── robots.txt
└── src  //開発用のファイルを配置するディレクトリ(初期状態ではサンプルが入っている)
    ├── App.css  //サンプルの App コンポーネント用の CSS
    ├── App.js  //サンプルの App コンポーネントのファイル
    ├── App.test.js
    ├── index.css  //サンプルの HTML 全体に適用する CSS
    ├── index.js  //サンプルの エントリーポイント
    ├── logo.svg
    ├── serviceWorker.js
    └── setupTests.js
public フォルダ
public フォルダにはアプリケーションの表示に使われるテンプレート(index.html )とテンプレートで参照する画像などのファイルを配置します。初期状態ではサンプルのファビコンやロゴなどが入っています。
public フォルダ内の index.html(テンプレート)を直接開いても何も表示されません。
内部的には HtmlWebpackPlugin というプラグインによりこのファイルをテンプレートとして表示用の index.html が生成されます。
%PUBLIC_URL% はビルドの際に public フォルダのパス(URL)に置き換えられます。public フォルダに配置したファイルのみが HTML から参照できます。
<!DOCTYPE html>
<html lang="en">
  <head>
    <meta charset="utf-8" />
    <link rel="icon" href="%PUBLIC_URL%/favicon.ico" />
    <meta name="viewport" content="width=device-width, initial-scale=1" />
    <meta name="theme-color" content="#000000" />
    <meta
      name="description"
      content="Web site created using create-react-app"
    />
    <link rel="apple-touch-icon" href="%PUBLIC_URL%/logo192.png" />
    <!--
      manifest.json provides metadata used when your web app is installed on a
      user's mobile device or desktop. See https://developers.google.com/web/fundamentals/web-app-manifest/
    -->
    <link rel="manifest" href="%PUBLIC_URL%/manifest.json" />
    <!--
      Notice the use of %PUBLIC_URL% in the tags above.
      It will be replaced with the URL of the `public` folder during the build.
      Only files inside the `public` folder can be referenced from the HTML.

      Unlike "/favicon.ico" or "favicon.ico", "%PUBLIC_URL%/favicon.ico" will
      work correctly both with client-side routing and a non-root public URL.
      Learn how to configure a non-root public URL by running `npm run build`.
    -->
    <title>React App</title>
  </head>
  <body>
    <noscript>You need to enable JavaScript to run this app.</noscript>
    <div id="root"></div>
    <!--
      This HTML file is a template.
      If you open it directly in the browser, you will see an empty page.

      You can add webfonts, meta tags, or analytics to this file.
      The build step will place the bundled scripts into the <body> tag.

      To begin the development, run `npm start` or `yarn start`.
      To create a production bundle, use `npm run build` or `yarn build`.
    -->
  </body>
</html>
コメント(36行目)にあるようにこのファイル(public/index.html)には Webフォントや meta タグなどを追加することができます。
デフォルトでは上記のようにファビコンの指定や meta タグの description、rel="apple-touch-icon" の Web Clip アイコン、rel="manifest" のウェブアプリマニフェストなどが設定されています。
例えば、ファビコンを変更するには、public フォルダにある favicon.ico を置き換えても良いですし、public フォルダに favicon というディレクトリを作成してその中に独自の favicon.ico を配置し、ファビコンの読み込みを以下のように変更することもできます。
<link rel="icon" href="%PUBLIC_URL%/favicon/favicon.ico" />
以下は npm run build コマンドでビルドして build フォルダに出力された index.html の例です。実際には HTML はミニファイされてスペースや改行は除去されています。
バンドルされた JavaScript は </body> の直前に挿入され、CSS は <head> 内に link 要素で挿入されます。但し、初期状態ではビルドが実行されていないので、以下の index.html は存在しません。
npm start コマンドで開発サーバを起動すると、開発サーバ上でバンドルされたファイルが挿入されてアプリケーションが表示されます(実際にはバンドルされたファイルは書き出されません)。
<!doctype html>
<html lang="en">
<head>
<meta charset="utf-8"/>
<link rel="icon" href="./favicon.ico"/>
<meta name="viewport" content="width=device-width,initial-scale=1"/>
<meta name="theme-color" content="#000000"/>
<meta name="description" content="Web site created using create-react-app"/>
<link rel="apple-touch-icon" href="./logo192.png"/>
<link rel="manifest" href="./manifest.json"/>
<title>React App</title>
<link href="./static/css/main.5f361e03.chunk.css" rel="stylesheet">
</head>
<body>
<noscript>
You need to enable JavaScript to run this app.
</noscript>
<div id="root"></div>
<script>!function(e){function r(r){for(var n,p,l=r[0],a=r[1],f=r[2],c=0,s=[];c<l.length;c++)p=l[c],Object.prototype.hasOwnProperty.call(o,p)&&o[p]&&s.push(o[p][0]),o[p]=0;for(n in
・・・中略・・・
[],a=l.push.bind(l);l.push=r,l=l.slice();for(var f=0;f<l.length;f++)r(l[f]);var i=a;t()}([])</script><script src="./static/js/2.b52875de.chunk.js"></script><script src="./static/js/main.c333ec07.chunk.js"></script>
</body>
</html>
src フォルダ
src フォルダには開発で利用する JavaScript や CSS などのファイルや画像等を配置し、基本的にこの中で開発を行っていきます。
my-app  //プロジェクトのディレクトリ
├── README.md
├── node_modules
├── package-lock.json
├── package.json
├── public
│   ├── favicon.ico
│   ├── index.html  //テンプレート
│   ├── logo192.png
│   ├── logo512.png
│   ├── manifest.json
│   └── robots.txt
└── src  //開発用のファイルを配置するディレクトリ(初期状態ではサンプルが入っている)
    ├── App.css  //サンプルの App コンポーネント用の CSS
    ├── App.js  //サンプルの App コンポーネントのファイル
    ├── App.test.js
    ├── index.css  //サンプルの HTML 全体に適用する CSS
    ├── index.js  //サンプルの エントリーポイント
    ├── logo.svg
    ├── serviceWorker.js
    └── setupTests.js
初期状態では src フォルダには index.js や App.js などサンプルのファイルが入っています。
エントリーポイントの index.js は以下のようになっています。
冒頭で以下のモジュールを読み込んでいます。
- React のコアライブラリ(1行目)
- React の DOM ライブラリ(2行目)
- スタイルシート(3行目)
- App コンポーネント(4行目)
- Service Worker(5行目)
7〜12行目で ReactDOM.render()メソッドを使用して、読み込んだ App コンポーネントをテンプレート(public/index.html)の id が root の div 要素にレンダリングしています。
import React from 'react';
import ReactDOM from 'react-dom';
import './index.css';
import App from './App';
import * as serviceWorker from './serviceWorker';

ReactDOM.render(
  <React.StrictMode>
    <App />
  </React.StrictMode>,
  document.getElementById('root')
);

// If you want your app to work offline and load faster, you can change
// unregister() to register() below. Note this comes with some pitfalls.
// Learn more about service workers: https://bit.ly/CRA-PWA
serviceWorker.unregister();
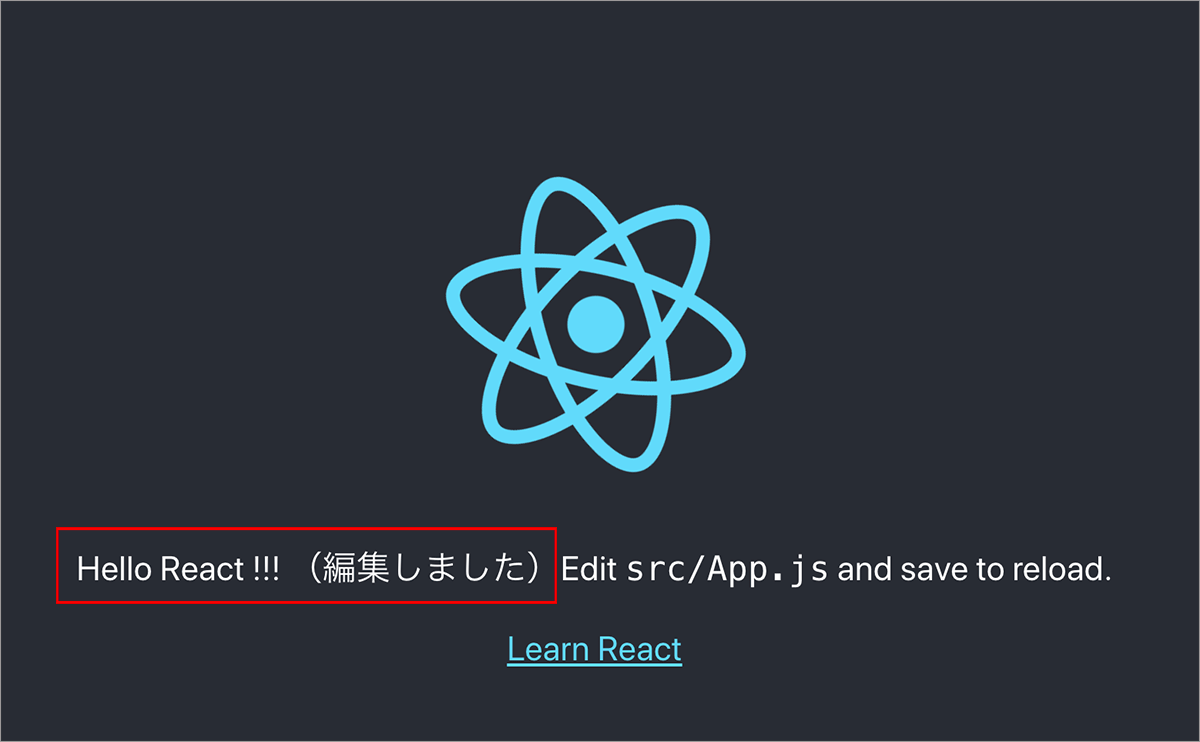
試しに App コンポーネントのファイル(src ディレクトリ内の App.js)を編集してみます。
import React from 'react';
import logo from './logo.svg';
import './App.css';

function App() {
  return (
    <div className="App">
      <header className="App-header">
        <img src={logo} className="App-logo" alt="logo" />
        <p>
          //以下に文字列を追加
          Hello React !!! (編集しました)Edit <code>src/App.js</code> and save to reload.
        </p>
        <a
          className="App-link"
          href="https://reactjs.org"
          target="_blank"
          rel="noopener noreferrer"
        >
          Learn React
        </a>
      </header>
    </div>
  );
}

export default App;
例えば上記のように「Hello React !!!(編集しました)」と追加して保存すると開発サーバには自動監視機能があるので、自動的に変更が検出されてブラウザのページが更新されます。
開発サーバを終了するには control + c を押します。
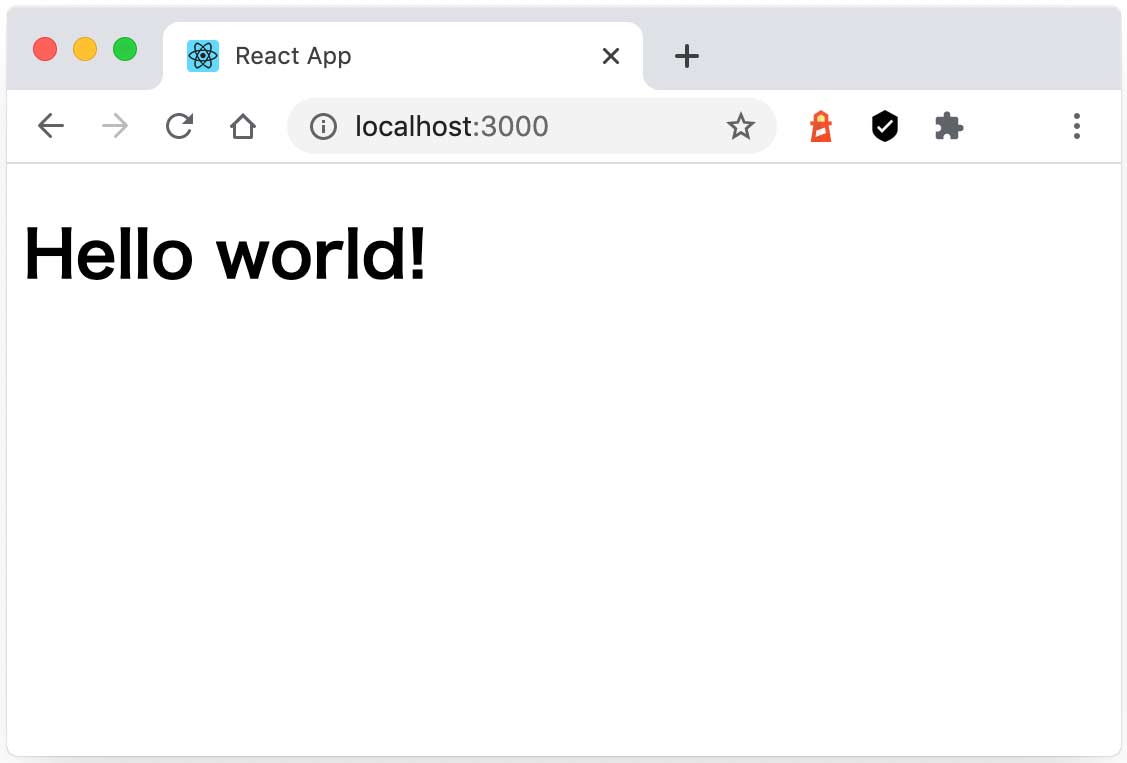
Hello World! と表示
前述の src フォルダ内の App.js を以下のように書き換えると Hello World! と表示されます。
// React の読み込み
import React from 'react';

//React.Component を継承して App という名前のコンポーネントを作成
class App extends React.Component {
  render() {
    return <h1>Hello world!</h1>
  }
}

//index.js で使えるように App をエクスポート
export default App;
上記のように書き換えて保存すると、開発サーバが自動的に変更を検知して以下のように表示されます。開発サーバを終了している場合は、再度 npm start を実行すればサーバを起動できます。
アプリケーションの公開
作成したアプリケーションを公開するには npm run build コマンドを使ってビルドを実行します。
npm run build コマンドを実行すると build フォルダが生成されてその中に公開に必要な静的ファイルが出力されます。
$ npm run build   return

> my-app@0.1.0 build /Applications/MAMP/htdocs/react-sample/my-app
> react-scripts build

Creating an optimized production build...
Compiled successfully.

File sizes after gzip:

  39.39 KB  build/static/js/2.763b34e5.chunk.js
  772 B     build/static/js/runtime-main.83c3e0c4.js
  689 B     build/static/js/main.1c4e7ec3.chunk.js
  547 B     build/static/css/main.5f361e03.chunk.css

//Document ルートに配置することを想定してビルドされる
The project was built assuming it is hosted at /.
You can control this with the homepage field in your package.json.

The build folder is ready to be deployed.
You may serve it with a static server:

  npm install -g serve
  serve -s build

Find out more about deployment here:

  bit.ly/CRA-deploy
生成された build ディレクトリを Web サーバ の Document ルート(例 public_html 直下)に配置すればアプリケーションを公開することができます。
my-app
├── README.md
├── build  //ビルドで出力されたディレクトリとファイル(これをアップ)
│   ├── asset-manifest.json
│   ├── favicon.ico
│   ├── index.html
│   ├── logo192.png
│   ├── logo512.png
│   ├── manifest.json
│   ├── precache-manifest.4cf958712719a8d4a654dd48ea3e6fe7.js
│   ├── robots.txt
│   ├── service-worker.js
│   └── static
│       ├── css
│       ├── js
│       └── media
├── node_modules
├── package-lock.json
├── package.json
├── public
│   ├── favicon.ico
│   ├── index.html
│   ├── logo192.png
│   ├── logo512.png
│   ├── manifest.json
│   └── robots.txt
└── src
    ├── App.css
    ├── App.js
    ├── App.test.js
    ├── index.css
    ├── index.js
    ├── logo.svg
    ├── serviceWorker.js
    └── setupTests.js
Document ルート以外に配置する場合
npm run build コマンドを実行した際に「The project was built assuming it is hosted at /. You can control this with the homepage field in your package.json.」というメッセージが表示されるように、アプリケーションはドキュメントルートに配置することを想定してビルドされます。
Document ルート以外に配置する場合は package.json の homepage フィールドを使って相対パスを指定することができます。
以下の例では一番最後(34行目)に homepage フィールドを追加して相対パスを指定しています。
{
  "name": "my-app",
  "version": "0.1.0",
  "private": true,
  "dependencies": {
    "@testing-library/jest-dom": "^4.2.4",
    "@testing-library/react": "^9.5.0",
    "@testing-library/user-event": "^7.2.1",
    "react": "^16.13.1",
    "react-dom": "^16.13.1",
    "react-scripts": "3.4.1"
  },
  "scripts": {
    "start": "react-scripts start",
    "build": "react-scripts build",
    "test": "react-scripts test",
    "eject": "react-scripts eject"
  },
  "eslintConfig": {
    "extends": "react-app"
  },
  "browserslist": {
    "production": [
      ">0.2%",
      "not dead",
      "not op_mini all"
    ],
    "development": [
      "last 1 chrome version",
      "last 1 firefox version",
      "last 1 safari version"
    ]
  },
  "homepage": "./"
}
上記のように package.json に "homepage": "./" を追加して再度 npm run build コマンドを実行すると生成された build ディレクトリを Web サーバ の Document ルート以外に配置することができます。
以下のように index.html 内のパスが相対パスになります。
<script src="./static/js/2.763b34e5.chunk.js">
デフォルトは以下のようなルートからの絶対パスにです。
<script src="/static/js/2.763b34e5.chunk.js">
設定のカスタマイズ
Create React App は内部的に webpack を使っていますが、ある意味で設定が隠されているので簡単に設定を変更できません。
基本的に設定を変更することはあまりないと思いますが、もし、設定をカスタマイズしたい場合は npm run eject コマンドを実行して設定を書き出して(必要なモジュールを個々にインストールしたのと同じ状態にして)それらを編集します。
但し、一度 npm run eject コマンドを実行すると、すべての構成とビルドの依存関係がプロジェクトに直接移動され、元に戻すことはできません。
npm run eject コマンド実行後は、構成とスクリプトを自分で保守する必要があります。
以下は Create React App の README (No Lock-In) からの抜粋です。
You can “eject” to a custom setup at any time. Run a single command, and all the configuration and build dependencies will be moved directly into your project, so you can pick up right where you left off.
package.json を見ると、npm run eject コマンドは実際には react-scripts eject を実行していることがわかります(17行目)。
{
  "name": "my-app",
  "version": "0.1.0",
  "private": true,
  "dependencies": {
    "@testing-library/jest-dom": "^4.2.4",
    "@testing-library/react": "^9.5.0",
    "@testing-library/user-event": "^7.2.1",
    "react": "^16.13.1",
    "react-dom": "^16.13.1",
    "react-scripts": "3.4.1"
  },
  "scripts": {
    "start": "react-scripts start",
    "build": "react-scripts build",
    "test": "react-scripts test",
    "eject": "react-scripts eject"
  },
  "eslintConfig": {
    "extends": "react-app"
  },
  "browserslist": {
    "production": [
      ">0.2%",
      "not dead",
      "not op_mini all"
    ],
    "development": [
      "last 1 chrome version",
      "last 1 firefox version",
      "last 1 safari version"
    ]
  },
  "homepage": "./"
}
react-scripts は Create React App をセットアップした際にインストールされていて package.json の dependencies に記載されています(上記11行目)。ファイルは node_modules の中にあります。
my-app
├── README.md
├── config
│   ├── env.js
│   ├── getHttpsConfig.js
│   ├── jest
│   ├── modules.js
│   ├── paths.js
│   ├── pnpTs.js
│   ├── webpack.config.js
│   └── webpackDevServer.config.js
├── node_modules   //インストールされたモジュール
│   ├── @babel
│   │   ├── code-frame
│   ・・・中略・・・
│   ├── react  //React 本体
│   ・・・中略・・・
│   │   └── umd
│   ├── react-app-polyfill
│   ・・・中略・・・
│   │   └── stable.js
│   ├── react-dev-utils
│   ・・・中略・・・
│   │   └── webpackHotDevClient.js
│   ├── react-dom  //ReactDOM
│   ・・・中略・・・
│   │   └── unstable-native-dependencies.js
│   ├── react-error-overlay
│   ・・・中略・・・
│   │   └── package.json
│   ├── react-is
│   │   ├── LICENSE
│   ・・・中略・・・
│   │   └── umd
│   ├── react-scripts  //react-scripts(詳細は次のツリー)
│   │   ├── LICENSE
│   │   ├── README.md
│   │   ├── bin
│   │   ├── config
│   │   ├── lib
│   │   ├── package.json
│   │   ├── scripts
│   │   ├── template
│   │   └── template-typescript
・・・以下省略・・・
以下は react-scripts のファイル構成です。config フォルダ内に webpack.config.js があり、scripts フォルダ内にコマンドがあります(これらのファイルを直接編集することはありません)。
react-scripts
├── LICENSE
├── README.md
├── bin
│   └── react-scripts.js
├── config
│   ├── env.js
│   ├── getHttpsConfig.js
│   ├── jest
│   │   ├── babelTransform.js
│   │   ├── cssTransform.js
│   │   └── fileTransform.js
│   ├── modules.js
│   ├── paths.js
│   ├── pnpTs.js
│   ├── webpack.config.js
│   └── webpackDevServer.config.js
├── lib
│   └── react-app.d.ts
├── package.json
├── scripts
│   ├── build.js
│   ├── eject.js
│   ├── init.js
│   ├── start.js
│   ├── test.js
│   └── utils
│       ├── createJestConfig.js
│       ├── verifyPackageTree.js
│       └── verifyTypeScriptSetup.js
├── template
│   └── README.md
└── template-typescript
    └── README.md
以下は npm run eject コマンドの実行例です。
$ npm run eject   return

> my-app@0.1.0 eject /Applications/MAMP/htdocs/react-sample/my-app
> react-scripts eject

NOTE: Create React App 2+ supports TypeScript, Sass, CSS Modules and more without ejecting: https://reactjs.org/blog/2018/10/01/create-react-app-v2.html

//本当に実行するかどうかを確認される
? Are you sure you want to eject? This action is permanent. Yes
Ejecting...

Copying files into /Applications/MAMP/htdocs/react-sample/my-app
  Adding /config/env.js to the project
  Adding /config/getHttpsConfig.js to the project
  Adding /config/modules.js to the project

  ・・・中略・・・

//依存関係を書き換え
Updating the dependencies
  Removing react-scripts from dependencies
  Adding @babel/core to dependencies
  Adding @svgr/webpack to dependencies
  Adding @typescript-eslint/eslint-plugin to dependencies
  Adding @typescript-eslint/parser to dependencies
  Adding babel-eslint to dependencies
  Adding babel-jest to dependencies
  Adding babel-loader to dependencies
  ・・・中略・・・
  Adding postcss-loader to dependencies
  Adding postcss-normalize to dependencies
  ・・・中略・・・
  Adding sass-loader to dependencies
  Adding style-loader to dependencies
  Adding terser-webpack-plugin to dependencies
  Adding ts-pnp to dependencies
  Adding url-loader to dependencies
  Adding webpack to dependencies
  Adding webpack-dev-server to dependencies
  Adding webpack-manifest-plugin to dependencies
  Adding workbox-webpack-plugin to dependencies

Updating the scripts
  Replacing "react-scripts start" with "node scripts/start.js"
  Replacing "react-scripts build" with "node scripts/build.js"
  Replacing "react-scripts test" with "node scripts/test.js"

Configuring package.json
  Adding Jest configuration
  Adding Babel preset

  ・・・以下省略・・・
以下は npm run eject コマンド実行後のファイル構成です。webpack.config.js などの設定ファイルが config ディレクトリに書き出されています。
my-app
├── README.md
├── config  //書き出された設定ファイルのディレクトリ
│   ├── env.js
│   ├── getHttpsConfig.js
│   ├── jest
│   │   ├── cssTransform.js
│   │   └── fileTransform.js
│   ├── modules.js
│   ├── paths.js
│   ├── pnpTs.js
│   ├── webpack.config.js
│   └── webpackDevServer.config.js
├── node_modules
├── package-lock.json
├── package.json
├── public
│   ├── favicon.ico
│   ├── index.html
│   ├── logo192.png
│   ├── logo512.png
│   ├── manifest.json
│   └── robots.txt
├── scripts
│   ├── build.js
│   ├── start.js
│   └── test.js
└── src
    ├── App.css
    ├── App.js
    ├── App.test.js
    ├── index.css
    ├── index.js
    ├── logo.svg
    ├── serviceWorker.js
    └── setupTests.js
また、react-scripts により隠されていた package.json の依存関係も書き換えられて、どのようなパッケージ(モジュール)がインストールされているかが確認できます。
{
  "name": "my-app",
  "version": "0.1.0",
  "private": true,
  "dependencies": {
    "@babel/core": "7.9.0",
    "@svgr/webpack": "4.3.3",
    "@testing-library/jest-dom": "^4.2.4",
    "@testing-library/react": "^9.5.0",
    "@testing-library/user-event": "^7.2.1",
    "@typescript-eslint/eslint-plugin": "^2.10.0",
    "@typescript-eslint/parser": "^2.10.0",
    "babel-eslint": "10.1.0",
    "babel-jest": "^24.9.0",
    "babel-loader": "8.1.0",
    "babel-plugin-named-asset-import": "^0.3.6",
    "babel-preset-react-app": "^9.1.2",
    "camelcase": "^5.3.1",
    "case-sensitive-paths-webpack-plugin": "2.3.0",
    "css-loader": "3.4.2",
    "dotenv": "8.2.0",
    "dotenv-expand": "5.1.0",
    "eslint": "^6.6.0",
    "eslint-config-react-app": "^5.2.1",
    "eslint-loader": "3.0.3",
    "eslint-plugin-flowtype": "4.6.0",
    "eslint-plugin-import": "2.20.1",
    "eslint-plugin-jsx-a11y": "6.2.3",
    "eslint-plugin-react": "7.19.0",
    "eslint-plugin-react-hooks": "^1.6.1",
    "file-loader": "4.3.0",
    "fs-extra": "^8.1.0",
    "html-webpack-plugin": "4.0.0-beta.11",
    "identity-obj-proxy": "3.0.0",
    "jest": "24.9.0",
    "jest-environment-jsdom-fourteen": "1.0.1",
    "jest-resolve": "24.9.0",
    "jest-watch-typeahead": "0.4.2",
    "mini-css-extract-plugin": "0.9.0",
    "optimize-css-assets-webpack-plugin": "5.0.3",
    "pnp-webpack-plugin": "1.6.4",
    "postcss-flexbugs-fixes": "4.1.0",
    "postcss-loader": "3.0.0",
    "postcss-normalize": "8.0.1",
    "postcss-preset-env": "6.7.0",
    "postcss-safe-parser": "4.0.1",
    "react": "^16.13.1",
    "react-app-polyfill": "^1.0.6",
    "react-dev-utils": "^10.2.1",
    "react-dom": "^16.13.1",
    "resolve": "1.15.0",
    "resolve-url-loader": "3.1.1",
    "sass-loader": "8.0.2",
    "semver": "6.3.0",
    "style-loader": "0.23.1",
    "terser-webpack-plugin": "2.3.5",
    "ts-pnp": "1.1.6",
    "url-loader": "2.3.0",
    "webpack": "4.42.0",
    "webpack-dev-server": "3.10.3",
    "webpack-manifest-plugin": "2.2.0",
    "workbox-webpack-plugin": "4.3.1"
  },
  "scripts": {
    "start": "node scripts/start.js",
    "build": "node scripts/build.js",
    "test": "node scripts/test.js"
  },
  ・・・以下省略・・・
npm run eject コマンド実行後 webpack.config.js は config フォルダに出力されます。
paths.js と webpack.config.js の例(長いです)を表示
以下は npm run eject コマンド実行後 webpack.config.js で変数 paths に読み込まれているパスを定義するファイル paths.js です。
'use strict';

const path = require('path');
const fs = require('fs');
const getPublicUrlOrPath = require('react-dev-utils/getPublicUrlOrPath');

// Make sure any symlinks in the project folder are resolved:
// https://github.com/facebook/create-react-app/issues/637
const appDirectory = fs.realpathSync(process.cwd());
const resolveApp = relativePath => path.resolve(appDirectory, relativePath);

// We use `PUBLIC_URL` environment variable or "homepage" field to infer
// "public path" at which the app is served.
// webpack needs to know it to put the right <script> hrefs into HTML even in
// single-page apps that may serve index.html for nested URLs like /todos/42.
// We can't use a relative path in HTML because we don't want to load something
// like /todos/42/static/js/bundle.7289d.js. We have to know the root.
const publicUrlOrPath = getPublicUrlOrPath(
  process.env.NODE_ENV === 'development',
  require(resolveApp('package.json')).homepage,
  process.env.PUBLIC_URL
);

const moduleFileExtensions = [
  'web.mjs',
  'mjs',
  'web.js',
  'js',
  'web.ts',
  'ts',
  'web.tsx',
  'tsx',
  'json',
  'web.jsx',
  'jsx',
];

// Resolve file paths in the same order as webpack
const resolveModule = (resolveFn, filePath) => {
  const extension = moduleFileExtensions.find(extension =>
    fs.existsSync(resolveFn(`${filePath}.${extension}`))
  );

  if (extension) {
    return resolveFn(`${filePath}.${extension}`);
  }

  return resolveFn(`${filePath}.js`);
};

// config after eject: we're in ./config/
module.exports = {
  dotenv: resolveApp('.env'),
  appPath: resolveApp('.'),
  appBuild: resolveApp('build'),
  appPublic: resolveApp('public'),
  appHtml: resolveApp('public/index.html'),
  appIndexJs: resolveModule(resolveApp, 'src/index'),
  appPackageJson: resolveApp('package.json'),
  appSrc: resolveApp('src'),
  appTsConfig: resolveApp('tsconfig.json'),
  appJsConfig: resolveApp('jsconfig.json'),
  yarnLockFile: resolveApp('yarn.lock'),
  testsSetup: resolveModule(resolveApp, 'src/setupTests'),
  proxySetup: resolveApp('src/setupProxy.js'),
  appNodeModules: resolveApp('node_modules'),
  publicUrlOrPath,
};


module.exports.moduleFileExtensions = moduleFileExtensions;
以下は npm run eject コマンド実行後の webpack.config.js です。
エントリポイントを設定する entry では paths.appIndexJs とあり、これは前述の paths.js で定義されている resolveModule(resolveApp, 'src/index') になっています。出力の設定 output では本番環境、開発環境でのそれぞれのファイル名などが設定されています。
HTML を自動的に出力する HtmlWebpackPlugin の設定ではテンプレートの指定 template: paths.appHtml(517行目)があり、paths.appHtml は paths.js で resolveApp('public/index.html') となっています。
また、「TODO: remove this when upgrading to webpack 5(171行目)」のような webpack のバージョンを5にアップグレードした場合に行うことについてのコメントも見受けられます。
'use strict';
const fs = require('fs');
const path = require('path');
const webpack = require('webpack');
const resolve = require('resolve');
const PnpWebpackPlugin = require('pnp-webpack-plugin');
const HtmlWebpackPlugin = require('html-webpack-plugin');
const CaseSensitivePathsPlugin = require('case-sensitive-paths-webpack-plugin');
const InlineChunkHtmlPlugin = require('react-dev-utils/InlineChunkHtmlPlugin');
const TerserPlugin = require('terser-webpack-plugin');
const MiniCssExtractPlugin = require('mini-css-extract-plugin');
const OptimizeCSSAssetsPlugin = require('optimize-css-assets-webpack-plugin');
const safePostCssParser = require('postcss-safe-parser');
const ManifestPlugin = require('webpack-manifest-plugin');
const InterpolateHtmlPlugin = require('react-dev-utils/InterpolateHtmlPlugin');
const WorkboxWebpackPlugin = require('workbox-webpack-plugin');
const WatchMissingNodeModulesPlugin = require('react-dev-utils/WatchMissingNodeModulesPlugin');
const ModuleScopePlugin = require('react-dev-utils/ModuleScopePlugin');
const getCSSModuleLocalIdent = require('react-dev-utils/getCSSModuleLocalIdent');
const paths = require('./paths');
const modules = require('./modules');
const getClientEnvironment = require('./env');
const ModuleNotFoundPlugin = require('react-dev-utils/ModuleNotFoundPlugin');
const ForkTsCheckerWebpackPlugin = require('react-dev-utils/ForkTsCheckerWebpackPlugin');
const typescriptFormatter = require('react-dev-utils/typescriptFormatter');
const postcssNormalize = require('postcss-normalize');
const appPackageJson = require(paths.appPackageJson);
// Source maps are resource heavy and can cause out of memory issue for large source files.
const shouldUseSourceMap = process.env.GENERATE_SOURCEMAP !== 'false';
// Some apps do not need the benefits of saving a web request, so not inlining the chunk
// makes for a smoother build process.
const shouldInlineRuntimeChunk = process.env.INLINE_RUNTIME_CHUNK !== 'false';
const isExtendingEslintConfig = process.env.EXTEND_ESLINT === 'true';
const imageInlineSizeLimit = parseInt(
process.env.IMAGE_INLINE_SIZE_LIMIT || '10000'
);
// Check if TypeScript is setup
const useTypeScript = fs.existsSync(paths.appTsConfig);
// style files regexes
const cssRegex = /\.css$/;
const cssModuleRegex = /\.module\.css$/;
const sassRegex = /\.(scss|sass)$/;
const sassModuleRegex = /\.module\.(scss|sass)$/;
// This is the production and development configuration.
// It is focused on developer experience, fast rebuilds, and a minimal bundle.
module.exports = function(webpackEnv) {
const isEnvDevelopment = webpackEnv === 'development';
const isEnvProduction = webpackEnv === 'production';
// Variable used for enabling profiling in Production
// passed into alias object. Uses a flag if passed into the build command
const isEnvProductionProfile =
isEnvProduction && process.argv.includes('--profile');
// We will provide `paths.publicUrlOrPath` to our app
// as %PUBLIC_URL% in `index.html` and `process.env.PUBLIC_URL` in JavaScript.
// Omit trailing slash as %PUBLIC_URL%/xyz looks better than %PUBLIC_URL%xyz.
// Get environment variables to inject into our app.
const env = getClientEnvironment(paths.publicUrlOrPath.slice(0, -1));
// common function to get style loaders
const getStyleLoaders = (cssOptions, preProcessor) => {
const loaders = [
isEnvDevelopment && require.resolve('style-loader'),
isEnvProduction && {
loader: MiniCssExtractPlugin.loader,
// css is located in `static/css`, use '../../' to locate index.html folder
// in production `paths.publicUrlOrPath` can be a relative path
options: paths.publicUrlOrPath.startsWith('.')
? { publicPath: '../../' }
: {},
},
{
loader: require.resolve('css-loader'),
options: cssOptions,
},
{
// Options for PostCSS as we reference these options twice
// Adds vendor prefixing based on your specified browser support in
// package.json
loader: require.resolve('postcss-loader'),
options: {
// Necessary for external CSS imports to work
// https://github.com/facebook/create-react-app/issues/2677
ident: 'postcss',
plugins: () => [
require('postcss-flexbugs-fixes'),
require('postcss-preset-env')({
autoprefixer: {
flexbox: 'no-2009',
},
stage: 3,
}),
// Adds PostCSS Normalize as the reset css with default options,
// so that it honors browserslist config in package.json
// which in turn let's users customize the target behavior as per their needs.
postcssNormalize(),
],
sourceMap: isEnvProduction && shouldUseSourceMap,
},
},
].filter(Boolean);
if (preProcessor) {
loaders.push(
{
loader: require.resolve('resolve-url-loader'),
options: {
sourceMap: isEnvProduction && shouldUseSourceMap,
},
},
{
loader: require.resolve(preProcessor),
options: {
sourceMap: true,
},
}
);
}
return loaders;
};
return {
mode: isEnvProduction ? 'production' : isEnvDevelopment && 'development',
// Stop compilation early in production
bail: isEnvProduction,
devtool: isEnvProduction
? shouldUseSourceMap
? 'source-map'
: false
: isEnvDevelopment && 'cheap-module-source-map',
// These are the "entry points" to our application.
// This means they will be the "root" imports that are included in JS bundle.
entry: [
// Include an alternative client for WebpackDevServer. A client's job is to
// connect to WebpackDevServer by a socket and get notified about changes.
// When you save a file, the client will either apply hot updates (in case
// of CSS changes), or refresh the page (in case of JS changes). When you
// make a syntax error, this client will display a syntax error overlay.
// Note: instead of the default WebpackDevServer client, we use a custom one
// to bring better experience for Create React App users. You can replace
// the line below with these two lines if you prefer the stock client:
// require.resolve('webpack-dev-server/client') + '?/',
// require.resolve('webpack/hot/dev-server'),
isEnvDevelopment &&
require.resolve('react-dev-utils/webpackHotDevClient'),
// Finally, this is your app's code:
paths.appIndexJs,
// We include the app code last so that if there is a runtime error during
// initialization, it doesn't blow up the WebpackDevServer client, and
// changing JS code would still trigger a refresh.
].filter(Boolean),
output: {
// The build folder.
path: isEnvProduction ? paths.appBuild : undefined,
// Add /* filename */ comments to generated require()s in the output.
pathinfo: isEnvDevelopment,
// There will be one main bundle, and one file per asynchronous chunk.
// In development, it does not produce real files.
filename: isEnvProduction
? 'static/js/[name].[contenthash:8].js'
: isEnvDevelopment && 'static/js/bundle.js',
// TODO: remove this when upgrading to webpack 5
futureEmitAssets: true,
// There are also additional JS chunk files if you use code splitting.
chunkFilename: isEnvProduction
? 'static/js/[name].[contenthash:8].chunk.js'
: isEnvDevelopment && 'static/js/[name].chunk.js',
// webpack uses `publicPath` to determine where the app is being served from.
// It requires a trailing slash, or the file assets will get an incorrect path.
// We inferred the "public path" (such as / or /my-project) from homepage.
publicPath: paths.publicUrlOrPath,
// Point sourcemap entries to original disk location (format as URL on Windows)
devtoolModuleFilenameTemplate: isEnvProduction
? info =>
path
.relative(paths.appSrc, info.absoluteResourcePath)
.replace(/\\/g, '/')
: isEnvDevelopment &&
(info => path.resolve(info.absoluteResourcePath).replace(/\\/g, '/')),
// Prevents conflicts when multiple webpack runtimes (from different apps)
// are used on the same page.
jsonpFunction: `webpackJsonp${appPackageJson.name}`,
// this defaults to 'window', but by setting it to 'this' then
// module chunks which are built will work in web workers as well.
globalObject: 'this',
},
optimization: {
minimize: isEnvProduction,
minimizer: [
// This is only used in production mode
new TerserPlugin({
terserOptions: {
parse: {
// We want terser to parse ecma 8 code. However, we don't want it
// to apply any minification steps that turns valid ecma 5 code
// into invalid ecma 5 code. This is why the 'compress' and 'output'
// sections only apply transformations that are ecma 5 safe
// https://github.com/facebook/create-react-app/pull/4234
ecma: 8,
},
compress: {
ecma: 5,
warnings: false,
// Disabled because of an issue with Uglify breaking seemingly valid code:
// https://github.com/facebook/create-react-app/issues/2376
// Pending further investigation:
// https://github.com/mishoo/UglifyJS2/issues/2011
comparisons: false,
// Disabled because of an issue with Terser breaking valid code:
// https://github.com/facebook/create-react-app/issues/5250
// Pending further investigation:
// https://github.com/terser-js/terser/issues/120
inline: 2,
},
mangle: {
safari10: true,
},
// Added for profiling in devtools
keep_classnames: isEnvProductionProfile,
keep_fnames: isEnvProductionProfile,
output: {
ecma: 5,
comments: false,
// Turned on because emoji and regex is not minified properly using default
// https://github.com/facebook/create-react-app/issues/2488
ascii_only: true,
},
},
sourceMap: shouldUseSourceMap,
}),
// This is only used in production mode
new OptimizeCSSAssetsPlugin({
cssProcessorOptions: {
parser: safePostCssParser,
map: shouldUseSourceMap
? {
// `inline: false` forces the sourcemap to be output into a
// separate file
inline: false,
// `annotation: true` appends the sourceMappingURL to the end of
// the css file, helping the browser find the sourcemap
annotation: true,
}
: false,
},
cssProcessorPluginOptions: {
preset: ['default', { minifyFontValues: { removeQuotes: false } }],
},
}),
],
// Automatically split vendor and commons
// https://twitter.com/wSokra/status/969633336732905474
// https://medium.com/webpack/webpack-4-code-splitting-chunk-graph-and-the-splitchunks-optimization-be739a861366
splitChunks: {
chunks: 'all',
name: false,
},
// Keep the runtime chunk separated to enable long term caching
// https://twitter.com/wSokra/status/969679223278505985
// https://github.com/facebook/create-react-app/issues/5358
runtimeChunk: {
name: entrypoint => `runtime-${entrypoint.name}`,
},
},
resolve: {
// This allows you to set a fallback for where webpack should look for modules.
// We placed these paths second because we want `node_modules` to "win"
// if there are any conflicts. This matches Node resolution mechanism.
// https://github.com/facebook/create-react-app/issues/253
modules: ['node_modules', paths.appNodeModules].concat(
modules.additionalModulePaths || []
),
// These are the reasonable defaults supported by the Node ecosystem.
// We also include JSX as a common component filename extension to support
// some tools, although we do not recommend using it, see:
// https://github.com/facebook/create-react-app/issues/290
// `web` extension prefixes have been added for better support
// for React Native Web.
extensions: paths.moduleFileExtensions
.map(ext => `.${ext}`)
.filter(ext => useTypeScript || !ext.includes('ts')),
alias: {
// Support React Native Web
// https://www.smashingmagazine.com/2016/08/a-glimpse-into-the-future-with-react-native-for-web/
'react-native': 'react-native-web',
// Allows for better profiling with ReactDevTools
...(isEnvProductionProfile && {
'react-dom$': 'react-dom/profiling',
'scheduler/tracing': 'scheduler/tracing-profiling',
}),
...(modules.webpackAliases || {}),
},
plugins: [
// Adds support for installing with Plug'n'Play, leading to faster installs and adding
// guards against forgotten dependencies and such.
PnpWebpackPlugin,
// Prevents users from importing files from outside of src/ (or node_modules/).
// This often causes confusion because we only process files within src/ with babel.
// To fix this, we prevent you from importing files out of src/ -- if you'd like to,
// please link the files into your node_modules/ and let module-resolution kick in.
// Make sure your source files are compiled, as they will not be processed in any way.
new ModuleScopePlugin(paths.appSrc, [paths.appPackageJson]),
],
},
resolveLoader: {
plugins: [
// Also related to Plug'n'Play, but this time it tells webpack to load its loaders
// from the current package.
PnpWebpackPlugin.moduleLoader(module),
],
},
module: {
strictExportPresence: true,
rules: [
// Disable require.ensure as it's not a standard language feature.
{ parser: { requireEnsure: false } },
// First, run the linter.
// It's important to do this before Babel processes the JS.
{
test: /\.(js|mjs|jsx|ts|tsx)$/,
enforce: 'pre',
use: [
{
options: {
cache: true,
formatter: require.resolve('react-dev-utils/eslintFormatter'),
eslintPath: require.resolve('eslint'),
resolvePluginsRelativeTo: __dirname,
},
loader: require.resolve('eslint-loader'),
},
],
include: paths.appSrc,
},
{
// "oneOf" will traverse all following loaders until one will
// match the requirements. When no loader matches it will fall
// back to the "file" loader at the end of the loader list.
oneOf: [
// "url" loader works like "file" loader except that it embeds assets
// smaller than specified limit in bytes as data URLs to avoid requests.
// A missing `test` is equivalent to a match.
{
test: [/\.bmp$/, /\.gif$/, /\.jpe?g$/, /\.png$/],
loader: require.resolve('url-loader'),
options: {
limit: imageInlineSizeLimit,
name: 'static/media/[name].[hash:8].[ext]',
},
},
// Process application JS with Babel.
// The preset includes JSX, Flow, TypeScript, and some ESnext features.
{
test: /\.(js|mjs|jsx|ts|tsx)$/,
include: paths.appSrc,
loader: require.resolve('babel-loader'),
options: {
customize: require.resolve(
'babel-preset-react-app/webpack-overrides'
),
plugins: [
[
require.resolve('babel-plugin-named-asset-import'),
{
loaderMap: {
svg: {
ReactComponent:
'@svgr/webpack?-svgo,+titleProp,+ref![path]',
},
},
},
],
],
// This is a feature of `babel-loader` for webpack (not Babel itself).
// It enables caching results in ./node_modules/.cache/babel-loader/
// directory for faster rebuilds.
cacheDirectory: true,
// See #6846 for context on why cacheCompression is disabled
cacheCompression: false,
compact: isEnvProduction,
},
},
// Process any JS outside of the app with Babel.
// Unlike the application JS, we only compile the standard ES features.
{
test: /\.(js|mjs)$/,
exclude: /@babel(?:\/|\\{1,2})runtime/,
loader: require.resolve('babel-loader'),
options: {
babelrc: false,
configFile: false,
compact: false,
presets: [
[
require.resolve('babel-preset-react-app/dependencies'),
{ helpers: true },
],
],
cacheDirectory: true,
// See #6846 for context on why cacheCompression is disabled
cacheCompression: false,
// Babel sourcemaps are needed for debugging into node_modules
// code. Without the options below, debuggers like VSCode
// show incorrect code and set breakpoints on the wrong lines.
sourceMaps: shouldUseSourceMap,
inputSourceMap: shouldUseSourceMap,
},
},
// "postcss" loader applies autoprefixer to our CSS.
// "css" loader resolves paths in CSS and adds assets as dependencies.
// "style" loader turns CSS into JS modules that inject <style> tags.
// In production, we use MiniCSSExtractPlugin to extract that CSS
// to a file, but in development "style" loader enables hot editing
// of CSS.
// By default we support CSS Modules with the extension .module.css
{
test: cssRegex,
exclude: cssModuleRegex,
use: getStyleLoaders({
importLoaders: 1,
sourceMap: isEnvProduction && shouldUseSourceMap,
}),
// Don't consider CSS imports dead code even if the
// containing package claims to have no side effects.
// Remove this when webpack adds a warning or an error for this.
// See https://github.com/webpack/webpack/issues/6571
sideEffects: true,
},
// Adds support for CSS Modules (https://github.com/css-modules/css-modules)
// using the extension .module.css
{
test: cssModuleRegex,
use: getStyleLoaders({
importLoaders: 1,
sourceMap: isEnvProduction && shouldUseSourceMap,
modules: {
getLocalIdent: getCSSModuleLocalIdent,
},
}),
},
// Opt-in support for SASS (using .scss or .sass extensions).
// By default we support SASS Modules with the
// extensions .module.scss or .module.sass
{
test: sassRegex,
exclude: sassModuleRegex,
use: getStyleLoaders(
{
importLoaders: 3,
sourceMap: isEnvProduction && shouldUseSourceMap,
},
'sass-loader'
),
// Don't consider CSS imports dead code even if the
// containing package claims to have no side effects.
// Remove this when webpack adds a warning or an error for this.
// See https://github.com/webpack/webpack/issues/6571
sideEffects: true,
},
// Adds support for CSS Modules, but using SASS
// using the extension .module.scss or .module.sass
{
test: sassModuleRegex,
use: getStyleLoaders(
{
importLoaders: 3,
sourceMap: isEnvProduction && shouldUseSourceMap,
modules: {
getLocalIdent: getCSSModuleLocalIdent,
},
},
'sass-loader'
),
},
// "file" loader makes sure those assets get served by WebpackDevServer.
// When you `import` an asset, you get its (virtual) filename.
// In production, they would get copied to the `build` folder.
// This loader doesn't use a "test" so it will catch all modules
// that fall through the other loaders.
{
loader: require.resolve('file-loader'),
// Exclude `js` files to keep "css" loader working as it injects
// its runtime that would otherwise be processed through "file" loader.
// Also exclude `html` and `json` extensions so they get processed
// by webpacks internal loaders.
exclude: [/\.(js|mjs|jsx|ts|tsx)$/, /\.html$/, /\.json$/],
options: {
name: 'static/media/[name].[hash:8].[ext]',
},
},
// ** STOP ** Are you adding a new loader?
// Make sure to add the new loader(s) before the "file" loader.
],
},
],
},
plugins: [
// Generates an `index.html` file with the <script> injected.
new HtmlWebpackPlugin(
Object.assign(
{},
{
inject: true,
template: paths.appHtml,
},
isEnvProduction
? {
minify: {
removeComments: true,
collapseWhitespace: true,
removeRedundantAttributes: true,
useShortDoctype: true,
removeEmptyAttributes: true,
removeStyleLinkTypeAttributes: true,
keepClosingSlash: true,
minifyJS: true,
minifyCSS: true,
minifyURLs: true,
},
}
: undefined
)
),
// Inlines the webpack runtime script. This script is too small to warrant
// a network request.
// https://github.com/facebook/create-react-app/issues/5358
isEnvProduction &&
shouldInlineRuntimeChunk &&
new InlineChunkHtmlPlugin(HtmlWebpackPlugin, [/runtime-.+[.]js/]),
// Makes some environment variables available in index.html.
// The public URL is available as %PUBLIC_URL% in index.html, e.g.:
// <link rel="icon" href="%PUBLIC_URL%/favicon.ico">
// It will be an empty string unless you specify "homepage"
// in `package.json`, in which case it will be the pathname of that URL.
new InterpolateHtmlPlugin(HtmlWebpackPlugin, env.raw),
// This gives some necessary context to module not found errors, such as
// the requesting resource.
new ModuleNotFoundPlugin(paths.appPath),
// Makes some environment variables available to the JS code, for example:
// if (process.env.NODE_ENV === 'production') { ... }. See `./env.js`.
// It is absolutely essential that NODE_ENV is set to production
// during a production build.
// Otherwise React will be compiled in the very slow development mode.
new webpack.DefinePlugin(env.stringified),
// This is necessary to emit hot updates (currently CSS only):
isEnvDevelopment && new webpack.HotModuleReplacementPlugin(),
// Watcher doesn't work well if you mistype casing in a path so we use
// a plugin that prints an error when you attempt to do this.
// See https://github.com/facebook/create-react-app/issues/240
isEnvDevelopment && new CaseSensitivePathsPlugin(),
// If you require a missing module and then `npm install` it, you still have
// to restart the development server for webpack to discover it. This plugin
// makes the discovery automatic so you don't have to restart.
// See https://github.com/facebook/create-react-app/issues/186
isEnvDevelopment &&
new WatchMissingNodeModulesPlugin(paths.appNodeModules),
isEnvProduction &&
new MiniCssExtractPlugin({
// Options similar to the same options in webpackOptions.output
// both options are optional
filename: 'static/css/[name].[contenthash:8].css',
chunkFilename: 'static/css/[name].[contenthash:8].chunk.css',
}),
// Generate an asset manifest file with the following content:
// - "files" key: Mapping of all asset filenames to their corresponding
// output file so that tools can pick it up without having to parse
// `index.html`
// - "entrypoints" key: Array of files which are included in `index.html`,
// can be used to reconstruct the HTML if necessary
new ManifestPlugin({
fileName: 'asset-manifest.json',
publicPath: paths.publicUrlOrPath,
generate: (seed, files, entrypoints) => {
const manifestFiles = files.reduce((manifest, file) => {
manifest[file.name] = file.path;
return manifest;
}, seed);
const entrypointFiles = entrypoints.main.filter(
fileName => !fileName.endsWith('.map')
);
return {
files: manifestFiles,
entrypoints: entrypointFiles,
};
},
}),
// Moment.js is an extremely popular library that bundles large locale files
// by default due to how webpack interprets its code. This is a practical
// solution that requires the user to opt into importing specific locales.
// https://github.com/jmblog/how-to-optimize-momentjs-with-webpack
// You can remove this if you don't use Moment.js:
new webpack.IgnorePlugin(/^\.\/locale$/, /moment$/),
// Generate a service worker script that will precache, and keep up to date,
// the HTML & assets that are part of the webpack build.
isEnvProduction &&
new WorkboxWebpackPlugin.GenerateSW({
clientsClaim: true,
exclude: [/\.map$/, /asset-manifest\.json$/],
importWorkboxFrom: 'cdn',
navigateFallback: paths.publicUrlOrPath + 'index.html',
navigateFallbackBlacklist: [
// Exclude URLs starting with /_, as they're likely an API call
new RegExp('^/_'),
// Exclude any URLs whose last part seems to be a file extension
// as they're likely a resource and not a SPA route.
// URLs containing a "?" character won't be blacklisted as they're likely
// a route with query params (e.g. auth callbacks).
new RegExp('/[^/?]+\\.[^/]+$'),
],
}),
// TypeScript type checking
useTypeScript &&
new ForkTsCheckerWebpackPlugin({
typescript: resolve.sync('typescript', {
basedir: paths.appNodeModules,
}),
async: isEnvDevelopment,
useTypescriptIncrementalApi: true,
checkSyntacticErrors: true,
resolveModuleNameModule: process.versions.pnp
? `${__dirname}/pnpTs.js`
: undefined,
resolveTypeReferenceDirectiveModule: process.versions.pnp
? `${__dirname}/pnpTs.js`
: undefined,
tsconfig: paths.appTsConfig,
reportFiles: [
'**',
'!**/__tests__/**',
'!**/?(*.)(spec|test).*',
'!**/src/setupProxy.*',
'!**/src/setupTests.*',
],
silent: true,
// The formatter is invoked directly in WebpackDevServerUtils during development
formatter: isEnvProduction ? typescriptFormatter : undefined,
}),
].filter(Boolean),
// Some libraries import Node modules but don't use them in the browser.
// Tell webpack to provide empty mocks for them so importing them works.
node: {
module: 'empty',
dgram: 'empty',
dns: 'mock',
fs: 'empty',
http2: 'empty',
net: 'empty',
tls: 'empty',
child_process: 'empty',
},
// Turn off performance processing because we utilize
// our own hints via the FileSizeReporter
performance: false,
};
};
Create React App : npm run eject
Create React App : Alternatives to Ejecting
独自に環境を構築
Create React App を使わずに Bable と webpack を使って独自に環境を構築することもできます。
実用的な環境を構築するのにはそれなりに手間がかかりますし、方法もいろいろとあると思いますが、以下は React の練習に使える程度の簡単な環境構築の一例です。
また、webpack を使って構築するため webpack の基本的な知識が必要です。
関連ページ:
以下は Node.js がインストールされていることが前提です。使用している node と npm、webpack のバージョンは以下になります。
- Node.js : 14.2.0
- npm : 6.14.5
- webpack : 4.43.0
また、OS は Mac です。
構成
最初は以下のようなファイル構成を作成します。この例のプロジェクト名は my-app2 としています。
dist フォルダは表示(公開)する HTML ファイルや webpack によりバンドルされたファイル(main.js)の出力先です。この段階では表示確認用のファイル index.html を配置しています。
src フォルダの中にはコンパイルが必要な React を記述した JavaScript ファイルなどを配置します。この例では React で記述した動作確認用の2つのファイルを配置しています。
my-app2(プロジェクトのディレクトリ)
├── dist  //出力先(output)フォルダ
│   └── index.html
└── src
    ├── app.js
    └── index.js  //エントリポイント
以下は dist フォルダの index.html です。script 要素で webpack によりバンドルされて出力される main.js を読み込んでいます(9行目)。
<!doctype html>
<html>
<head>
  <meta charset="utf-8">
  <title>React 環境構築サンプル</title>
  <meta name="viewport" content="width=device-width,initial-scale=1">
</head>
<body>
  <script src="main.js"></script>
</body>
</html>
以下は src フォルダの app.js と index.js です。app.js で作成する関数 App をエクスポートして index.js で読み込みます。
import React from 'react'

function App() {
  return (
    <div className="App">
      <h1>Hello, React!!!</h1>
    </div>
  )
}

export default App;
index.js では id が root の div 要素を生成してそこに App で作成した h1 要素を表示しています。
import React from 'react'
import ReactDOM from 'react-dom'
import App from './App';  // app.js の App をインポート

const root = document.createElement('div');
root.setAttribute('id', 'root');
document.body.appendChild(root);

ReactDOM.render(
  <React.StrictMode>
    <App />
  </React.StrictMode>,
  document.getElementById('root')
);
webpack Bable React のインストール
npm を使って必要なパッケージをインストールします。
パッケージをインストールするために npm init で初期化をして package.json を生成します。
ターミナルでプロジェクトのディレクトリ(my-app2)に移動して以下を実行します。
//デフォルト値で package.json を生成
$ npm init -y   return

// 生成される package.json の出力先と内容が表示される
Wrote to /Applications/MAMP/htdocs/sample/my-app2/package.json:
{
  "name": "my-app2",
  "version": "1.0.0",
  "description": "",
  "main": "index.js",
  "scripts": {
    "test": "echo \"Error: no test specified\" && exit 1"
  },
  "keywords": [],
  "author": "",
  "license": "ISC"
}
webpack
webpack と webpack-cli をインストールします。
関連項目:webpack のインストール
$ npm install --save-dev webpack webpack-cli   return
・・・中略・・・

+ webpack-cli@3.3.12
+ webpack@4.43.0
Babel
React を使うのに必要な以下の Babel のモジュールをインストールします。
- @babel/core :Babel の本体
- @babel/preset-env :Babel の環境設定
- @babel/preset-react : JSX を JavaScript に変換
- babel-loader:webpack での処理に必要
関連項目:babel-loader
$ npm install --save-dev @babel/core @babel/preset-env @babel/preset-react babel-loader   return
・・・中略・・・

+ babel-loader@8.1.0
+ @babel/preset-react@7.10.1
+ @babel/preset-env@7.10.3
+ @babel/core@7.10.3
[追記]クラスフィールド構文(proposal-class-fields)を使う場合
現時点では JavaScript の実験的機能(experimental syntax)のクラスフィールド構文(proposal-class-fields)を使う場合は Babel のプラグインをインストールする必要があります。
クラスフィールド構文(proposal-class-fields)を使わない場合は不要ですので、React のインストールへ進みます。
以下は React のイベント処理のページで紹介されている例ですが、以下のような構文などを使えるようにするには babel-plugin-transform-class-properties をインストールする必要があります。
class LoggingButton extends React.Component {
  // This syntax ensures `this` is bound within handleClick.
  // Warning: this is *experimental* syntax.(クラスフィールド構文)
  handleClick = () => {
    console.log('this is:', this);
  }

  render() {
    return (
      <button onClick={this.handleClick}>
        Click me
      </button>
    );
  }
}
babel-plugin-transform-class-properties をインストールします。
//babel-plugin-transform-class-properties のインストール
$ npm install --save-dev babel-plugin-transform-class-properties   return
webpack.config.js(後述)に以下を追加します。
plugins: ["transform-class-properties"]
※上記プラグインをインストールして、ESLint を使う場合は、babel-eslint もインストールして ESLint の設定ファイル .eslintrc.json で parser を babel-eslint に指定する必要があります。
babel-eslint を使うことで、非標準仕様でも lint できるようにすることができます。
以下は babel-eslint をインストールする例です。
//babel-eslint のインストール
$ npm install babel-eslint --save-dev  return
.eslintrc.json に以下の行を追加する必要がありますます。
"parser": "babel-eslint",
React
React に必要なパッケージをインストールします。
- react:React のコアライブラリ
- react-dom:React の DOM ライブラリ
$ npm install --save-dev react react-dom   return
・・・中略・・・

+ react-dom@16.13.1
+ react@16.13.1
この時点で package.json は以下のようになって、devDependencies にインストールしたパッケージがリストされています。6行目の "private": true は念の為に追加しています。
{
  "name": "my-app2",
  "version": "1.0.0",
  "description": "",
  "main": "index.js",
  "private": true,
  "scripts": {
    "test": "echo \"Error: no test specified\" && exit 1"
  },
  "keywords": [],
  "author": "",
  "license": "ISC",
  "devDependencies": {
    "@babel/core": "^7.10.3",
    "@babel/preset-env": "^7.10.3",
    "@babel/preset-react": "^7.10.1",
    "babel-loader": "^8.1.0",
    "react": "^16.13.1",
    "react-dom": "^16.13.1",
    "webpack": "^4.43.0",
    "webpack-cli": "^3.3.12"
  }
}
babel-plugin-transform-class-properties と babel-eslint をインストールした場合は、devDependencies は以下のようになっています。
{
    ・・・中略・・・
  "devDependencies": {
    "@babel/core": "^7.10.3",
    "@babel/preset-env": "^7.10.3",
    "@babel/preset-react": "^7.10.1",
    "babel-eslint": "^10.1.0",
    "babel-loader": "^8.1.0",
    "babel-plugin-transform-class-properties": "^6.24.1",
    "react": "^16.13.1",
    "react-dom": "^16.13.1",
    "webpack": "^4.43.0",
    "webpack-cli": "^3.3.12"
  }
}
webpack.config.js
最低限必要なパッケージをインストールしたので、webpack.config.js という名前の webpack の設定ファイルを作成して設定を以下のように記述します。
entry にはエントリポイント(入力ファイル)を指定します。この例では src/index.js になります。webpack はエントリポイントに指定されたファイルを元に依存関係を解析します。
output は webpack がバンドルしたファイルを出力する先を設定します。この例の場合は dist フォルダに main.js という名前で出力するように設定しています。
また、Bable を使うためにローダーの設定を記述しています。ファイルの拡張子が js や mjs、jsx の場合は Babel で処理するように指定しています。
const path = require('path');

module.exports = {
  //エントリポイント(入力ファイル)
  entry: './src/index.js',
  //出力先
  output: {
    filename: 'main.js',
    path: path.resolve(__dirname, 'dist'),
  },
  module: {
    rules: [
      {
        // Babel のローダーの設定
        //対象のファイルの拡張子
        test: /\.(js|mjs|jsx)$/,
        //対象外とするフォルダ
        exclude: /node_modules/,
        use: [
          {
            loader: 'babel-loader',
            options: {
              presets: [
                '@babel/preset-env',
                '@babel/preset-react',
              ]
            }
          }
        ]
      }
    ]
  },
};
[追記]babel-plugin-transform-class-properties をインストールした場合は、Babel のローダーの設定部分の options: に以下のように plugins: ["transform-class-properties"] を追加します。
{
  // Babel のローダー
  test: /\.(js|mjs|jsx)$/,
  exclude: /node_modules/,
  use: [
    {
      loader: 'babel-loader',
      options: {
        presets: [
          '@babel/preset-env',
          '@babel/preset-react',
        ],
        //babel-plugin-transform-class-properties をインストールした場合
        plugins: ["transform-class-properties"]
      }
    }
  ]
}
webpack コマンドを実行してビルドすると、src/app.js と index.js の JSX が Babel で普通の JavaScript に変換され、そしてバンドルされて dist フォルダに main.js という名前で出力されます。
$ npx webpack --mode development   return  //webpack コマンドを実行
Hash: 0b11eb1c075e2de16382
Version: webpack 4.43.0
Time: 693ms
Built at: 2020/06/22 17:17:39
  Asset     Size  Chunks             Chunk Names
main.js  977 KiB    main  [emitted]  main
Entrypoint main = main.js
[./src/App.js] 508 bytes {main} [built]
[./src/index.js] 347 bytes {main} [built]
    + 11 hidden modules
この時点でプロジェクトのフォルダ(my-app2)の構成は以下のようになっています。
my-app2
├── dist
│   ├── index.html
│   └── main.js  // webpack でバンドルされて出力されるファイル
├── node_modules // npm でインストールしたパッケージが格納されているディレクトリ
├── package-lock.json  // npm により生成されるファイル
├── package.json  // npm の設定ファイル
├── src
│   ├── app.js
│   └── index.js
└── webpack.config.js  //webpack の設定ファイル
dist フォルダの index.html を開くと「Hello, React!」と表示されます。
確認のため、app.js を以下のように「Hello」を「ハロー」に書き換えます。
import React from 'react'

function App() {
  return (
    <div className="App">
      <h1>ハロー, React!</h1>
    </div>
  )
}

export default App;
このままでは変更は反映されないので、webpack コマンドを実行してビルドして確認すると「ハロー, React!」と表示されます。
以下は production モードで webpack を実行した例です。
$ npx webpack --mode production   return  //production モードで実行
Hash: ba613370ec973bae0523
Version: webpack 4.43.0
Time: 1647ms
Built at: 2020/06/22 20:51:44
  Asset     Size  Chunks             Chunk Names
main.js  128 KiB       0  [emitted]  main
Entrypoint main = main.js
[7] ./src/index.js + 1 modules 878 bytes {0} [built]
    | ./src/index.js 347 bytes [built]
    | ./src/App.js 521 bytes [built]
    + 7 hidden modules
main.js を確認すると、production モードで webpack を実行したので、以下のようにバンドルされたコードが圧縮されています。
!function(e){var t={};function n(r){if(t[r])return t[r].exports;var l=t[r]={i:r,l:!1,exports:{}};return e[r].call(l.exports,l,l.exports,n),l.l=!0,l.exports}n.m=e,n.c=t,n.d=function(e,t,r){n.o(e,t)||Object.defineProperty(e,t,{enumerable:!0,get:r})},n.r=function(e){"undefined"!=typeof Symbol&&Symbol.toStringTag&&Object.defineProperty(e,Symbol.toStringTag,
・・・中略・・・
/*
object-assign
(c) Sindre Sorhus
@license MIT
*/var r=Object.getOwnPropertySymbols,l=Object.prototype.hasOwnProperty,i=Object.prototype.propertyIsEnumerable;function a(e){if(null==e)throw new TypeError(
・・・以下省略・・・
watch オプション
watch オプションを利用するとファイルを監視してファイルが変更されると自動的にビルドを再実行することができます。
webpack コマンドを実行する際に --watch を指定して実行すると watch モードになり、src フォルダ内のファイルが変更されると自動的にリビルドされます。
$ npx webpack --mode production --watch   return  //watch モードで実行
webpack is watching the files…

Hash: e783650b8ca7025cc8b2
Version: webpack 4.43.0
Time: 478ms
Built at: 2020/06/23 8:18:24
  Asset     Size  Chunks             Chunk Names
main.js  128 KiB       0  [emitted]  main
Entrypoint main = main.js
[7] ./src/index.js + 1 modules 890 bytes {0} [built]
    | ./src/index.js 347 bytes [built]
    | ./src/App.js 533 bytes [built]
    + 7 hidden modules

// ファイルを変更して保存すると自動的にビルドされる
Hash: a9810747a4b613457db9
Version: webpack 4.43.0
Time: 1124ms
Built at: 2020/06/23 8:22:01
  Asset     Size  Chunks             Chunk Names
main.js  128 KiB       0  [emitted]  main
Entrypoint main = main.js
[7] ./src/index.js + 1 modules 865 bytes {0} [built]
    | ./src/index.js 347 bytes [built]
    | ./src/App.js 508 bytes [built]
    + 7 hidden modules
watch モードで監視対象のファイルを変更すると自動的にリビルドされますが、確認するにはブラウザで再読込する必要があります。
watch モードを終了するには control + c を押します。
npm script
package.json の scripts フィールドにコマンド(npm script)を追加しておくと npm run コマンドで webpack を実行することができます。
以下は package.json の scripts フィールドに build、dev、watch の3つの npm script(9〜11行目)を登録した例です。
{
  "name": "my-app2",
  "version": "1.0.0",
  "description": "",
  "main": "index.js",
  "private": true,
  "scripts": {
    "test": "echo \"Error: no test specified\" && exit 1",
    "build": "webpack --mode production",
    "dev": "webpack --mode development",
    "watch": "webpack --mode development --watch"
  },
  "keywords": [],
  "author": "",
  "license": "ISC",
  "devDependencies": {
    "@babel/core": "^7.10.3",
    "@babel/preset-env": "^7.10.3",
    "@babel/preset-react": "^7.10.1",
    "babel-loader": "^8.1.0",
    "react": "^16.13.1",
    "react-dom": "^16.13.1",
    "webpack": "^4.43.0",
    "webpack-cli": "^3.3.12"
  }
}
上記のように設定しておくと、例えば watch モード(及び development モード)で webpack コマンドを実行するには以下のようにします。
$ npm run watch
// webpack --mode development --watch と同じこと
webpack-dev-server
watch オプションを利用するとファイルを監視して自動的にリビルドが実行されますが、ブラウザでの確認には再読み込みが必要です。
webpack-dev-server を使うとファイルが変更されると自動的にブラウザにも反映することできます。
但し、デフォルトではバンドルされて出力されるファイルは実際には書き出されないので、別途 webpack コマンドを実行してビルドする必要があります(オプションで変更可能)。
関連項目:webpack-dev-server
インストール
webpack-dev-server のパッケージをインストールします。
$ npm install --save-dev webpack-dev-server  return
・・・中略・・・
+ webpack-dev-server@3.11.0
npm script
webpack-dev-server を簡単に実行できるように package.json の scripts フィールドに npm script を追加します。
以下ではスクリプト名 start を使って登録しています(12行目)。start は特別に予約されているスクリプト名で、登録したスクリプトは npm start で実行することができます。
{
  "name": "my-app2",
  "version": "1.0.0",
  "description": "",
  "main": "index.js",
  "private": true,
  "scripts": {
    "test": "echo \"Error: no test specified\" && exit 1",
    "build": "webpack --mode production",
    "dev": "webpack --mode development",
    "watch": "webpack --mode development --watch",
    "start": "webpack-dev-server"
  },
  "keywords": [],
  "author": "",
  "license": "ISC",
  "devDependencies": {
    "@babel/core": "^7.10.3",
    "@babel/preset-env": "^7.10.3",
    "@babel/preset-react": "^7.10.1",
    "babel-loader": "^8.1.0",
    "react": "^16.13.1",
    "react-dom": "^16.13.1",
    "webpack": "^4.43.0",
    "webpack-cli": "^3.3.12",
    "webpack-dev-server": "^3.11.0"
  }
}
オプション
webpack-dev-server のオプションを webpack.config.js の devServer で以下のように設定します。
32〜41行目でルートディレクトリやブラウザの自動起動、ポート番号などを設定しています。
42行目は更新時にバンドルされたファイルを実際に書き出すようにするオプションです。
const path = require('path');
//const  webpack = require('webpack');

module.exports = {
  entry: './src/index.js',
  output: {
    filename: 'main.js',
    path: path.resolve(__dirname, 'dist'),
  },
  // ローダーの設定
  module: {
    rules: [
      {
        // Babel のローダー
        test: /\.(js|mjs|jsx)$/,
        exclude: /node_modules/,
        use: [
          {
            loader: 'babel-loader',
            options: {
              presets: [
                '@babel/preset-env',
                '@babel/preset-react',
              ]
            }
          }
        ]
      }
    ]
  },
  //webpack-dev-server の設定
  devServer: {
    //ルートディレクトリの指定
    contentBase: path.join(__dirname, 'dist'),
    //サーバー起動時にブラウザを自動的に起動
    open: true,
    // ルートディレクトリのファイルを監視
    watchContentBase: true,
    // ポート番号を変更
    port: 3000,
    //バンドルされたファイルを出力する(実際に書き出す)には以下のコメントアウトを外す
    //writeToDisk: true
  }
};
上記を設定後、以下の npm start コマンドで開発サーバが起動して、ブラウザが自動的に立ち上がります。
URL はオプションでポートを 3000 に指定しているので http://localhost:3000/ になります。
$ npm start  return

> my-app2@1.0.0 start /Applications/MAMP/htdocs/sample/my-app2
> webpack-dev-server

ℹ 「wds」: Project is running at http://localhost:3000/ ←ブラウザで表示するための URL
ℹ 「wds」: webpack output is served from /
ℹ 「wds」: Content not from webpack is served from /Applications/MAMP/htdocs/sample/my-app2/dist
ℹ 「wdm」: wait until bundle finished: /
ℹ 「wdm」: Hash: 40204d0935d10731e3d9
Version: webpack 4.43.0
Time: 943ms
Built at: 2020/06/23 9:25:30
  Asset     Size  Chunks             Chunk Names
main.js  1.3 MiB    main  [emitted]  main
Entrypoint main = main.js
[0] multi (webpack)-dev-server/client?http://localhost:3000 ./src/index.js 40 bytes {main} [built]
[./node_modules/ansi-html/index.js] 4.16 KiB {main} [built]
[./node_modules/react-dom/index.js] 1.33 KiB {main} [built]
[./node_modules/react/index.js] 190 bytes {main} [built]
[./node_modules/webpack-dev-server/client/index.js?http://localhost:3000] (webpack)-dev-server/client?http://localhost:3000 4.29 KiB {main} [built]
[./node_modules/webpack-dev-server/client/overlay.js] (webpack)-dev-server/client/overlay.js 3.51 KiB {main} [built]
・・・以下省略・・・
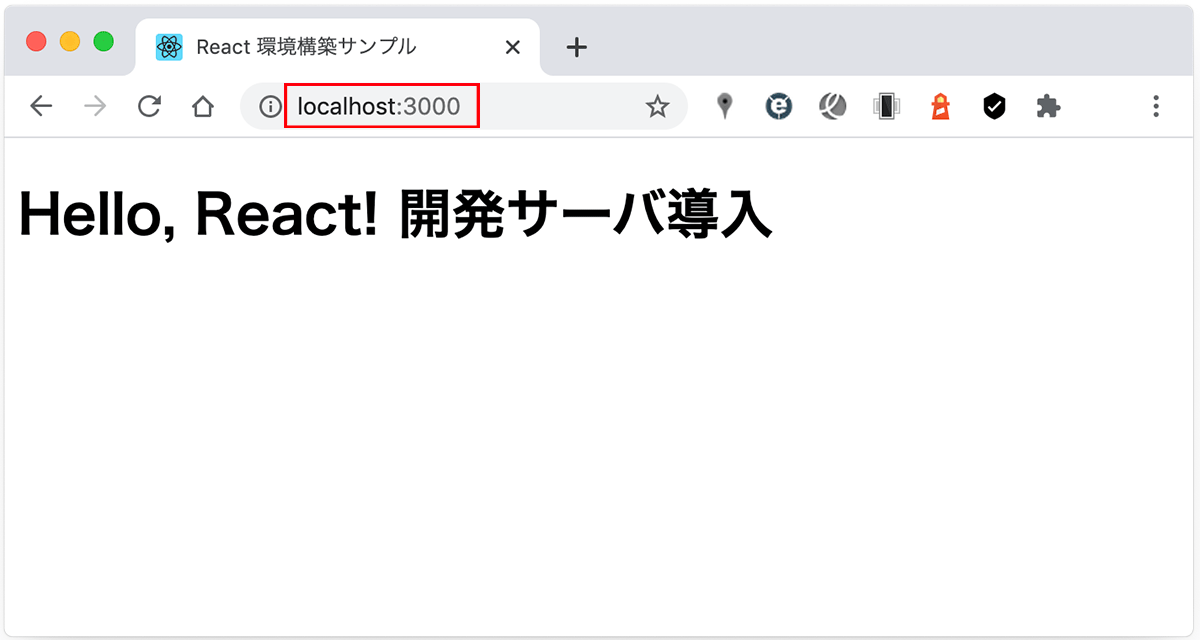
ファイルを変更して保存すると即座にブラウザに反映されます。オプションで watchContentBase: true を指定しているので dist フォルダの HTML を変更しても自動的にブラウザがリロードされます。
例えば app.js で「開発サーバ導入」という文字を追加して保存すると、その時点で変更がブラウザに反映されます。
import React from 'react'

function App() {
  return (
    <div className="App">
      <h1>Hello, React! 開発サーバ導入</h1>
    </div>
  )
}

export default App;
終了するには control + c を押します。
※バンドルされて出力されるファイルは実際には書き出されないので、別途 webpack コマンドを実行してビルドする必要があります。
関連項目:バンドルされたファイルは出力されない
CSS Loaders
必要に応じて CSS も webpack で扱うことができます。
以下は css-loader と MiniCssExtractPlugin 及び optimize-css-assets-webpack-plugin を使って CSS を扱えるようにする例です。
css-loader は webpack が CSS を処理するためのモジュールです。
MiniCssExtractPlugin を使うと CSS を JavaScript のバンドルとは別ファイルとして出力することができます。
この例では MiniCssExtractPlugin を使って CSS を別ファイルとして出力します。CSS を別ファイルとせずに head 要素内に style タグで出力するには style-loader を使います。
optimize-css-assets-webpack-plugin は CSS を圧縮して出力するためのプラグインです。
css-loader と MiniCssExtractPlugin 及び optimize-css-assets-webpack-plugin のパッケージをインストールします。
npm install --save-dev css-loader mini-css-extract-plugin optimize-c-assets-webpack-plugin  return

+ mini-css-extract-plugin@0.9.0
+ optimize-css-assets-webpack-plugin@5.0.3
+ css-loader@3.6.0
この時点での package.json は CSS 関連のパッケージが追加されて以下のようになっています。
{
  "name": "my-app2",
  "version": "1.0.0",
  "description": "",
  "main": "index.js",
  "private": true,
  "scripts": {
    "test": "echo \"Error: no test specified\" && exit 1",
    "build": "webpack --mode production",
    "dev": "webpack --mode development",
    "watch": "webpack --mode development --watch",
    "start": "webpack-dev-server"
  },
  "keywords": [],
  "author": "",
  "license": "ISC",
  "devDependencies": {
    "@babel/core": "^7.10.3",
    "@babel/preset-env": "^7.10.3",
    "@babel/preset-react": "^7.10.1",
    "babel-loader": "^8.1.0",
    "css-loader": "^3.6.0",
    "mini-css-extract-plugin": "^0.9.0",
    "optimize-css-assets-webpack-plugin": "^5.0.3",
    "react": "^16.13.1",
    "react-dom": "^16.13.1",
    "webpack": "^4.43.0",
    "webpack-cli": "^3.3.12",
    "webpack-dev-server": "^3.11.0"
  }
}
css-loader と MiniCssExtractPlugin 及び optimize-css-assets-webpack-plugin の設定を webpack.config.js に追加します。
冒頭(2〜7行目)で追加したモジュールを読み込みます。また、プラグインやローダーの設定を追加します。
const path = require('path');
//mini-css-extract-plugin の読み込み
const MiniCssExtractPlugin = require('mini-css-extract-plugin');
//optimize-css-assets-webpack-plugin の読み込み
const OptimizeCSSAssetsPlugin = require('optimize-css-assets-webpack-plugin');
//JavaScript の圧縮用のプラグイン TerserPlugin の読み込み
const TerserPlugin = require('terser-webpack-plugin');

module.exports = {
  entry: './src/index.js',
  output: {
    filename: 'main.js',
    path: path.resolve(__dirname, 'dist'),
  },
  //プラグインの設定
  plugins: [
    new MiniCssExtractPlugin({
      //出力するスタイルシートの名前
      filename: 'style.css',
    }),
  ],
  //optimization プロパティ
  optimization: {
    //圧縮方法(圧縮に使うプラグイン)を変更
    minimizer: [
      //JavaScript 用の圧縮プラグイン
      new TerserPlugin({}),
      //CSS 用の圧縮プラグイン
      new OptimizeCSSAssetsPlugin({})
    ],
  },
  // ローダーの設定
  module: {
    rules: [
      {
        // CSS のローダー
        //ローダーの処理対象ファイル(拡張子 .css)
        test: /\.css$/i,
        use: [
          // CSSファイルを抽出するように MiniCssExtractPlugin のローダーを指定
          {
            loader: MiniCssExtractPlugin.loader,
          },
          // CSS を CommonJS に変換するローダー
          'css-loader',
        ],
      },

      {
        // Babel のローダー
        test: /\.(js|mjs|jsx)$/,
        exclude: /node_modules/,
        use: [
          {
            loader: 'babel-loader',
            options: {
              presets: [
                '@babel/preset-env',
                '@babel/preset-react',
              ]
            }
          }
        ]
      }
    ]
  },
  //webpack-dev-server の設定
  devServer: {
    //ルートディレクトリの指定
    contentBase: path.join(__dirname, 'dist'),
    //サーバー起動時にブラウザを自動的に起動
    open: true,
    // ルートディレクトリのファイルを監視
    watchContentBase: true,
    // ポート番号を変更
    port: 3000
  }
};
CSS が適用されるかを確認するために、style.css を src フォルダに配置して、src フォルダ内の index.js で style.css をインポートします。
body {
  color: #9FBAF7;
  background-color: #0F3386;
}
import React from 'react'
import ReactDOM from 'react-dom'
import App from './App'
import './style.css'  //style.css の読み込み

const root = document.createElement('div');
root.setAttribute('id', 'root');
document.body.appendChild(root);

ReactDOM.render(
  <React.StrictMode>
    <App />
  </React.StrictMode>,
  document.getElementById('root')
);
dist フォルダの index.html を編集して dist フォルダに出力される CSS の読み込みを追加します。
<!doctype html>
<html>
<head>
  <meta charset="utf-8">
  <title>React 環境構築サンプル</title>
  <meta name="viewport" content="width=device-width,initial-scale=1">
  <link rel="stylesheet" href="style.css"><!-- 追加 -->
</head>
<body>
  <script src="main.js"></script>
</body>
</html>
以下を実行してファイルを開くと CSS が適用されていることが確認できます。
$ npm run build
または以下を実行して開発サーバを起動して確認することができます。
$ npm start

この時点でのファイル構成は以下のようになっています。ビルドせずに開発サーバを起動しただけでは、CSS の適用は確認できますが、style.css はまだ書き出されていません(メモリ上にあるだけ)。style.css を dist フォルダに出力するにはビルドする必要があります。
my-app2
├── dist
│   ├── index.html
│   ├── main.js  //webpack により出力される JavaScript のバンドル
│   └── style.css  //webpack により出力される CSS
├── package-lock.json
├── package.json
├── src
│   ├── app.js
│   ├── index.js
│   └── style.css  //追加した CSS
└── webpack.config.js
file-loader
スタイルシートで画像を読み込んでいる場合、画像も処理の対象になるので画像を変換するためのローダーが必要になります。
この例では file-loader を使ってスタイルシートで読み込んでいる画像などを出力ファイルにバンドルせずに、出力フォルダーにコピーして参照するようにします。
file-loader を追加インストールします。
$ npm install file-loader --save-dev  return
+ file-loader@6.0.0
file-loader の設定を webpack.config.js に追加します(49〜62行目)。
const path = require('path');
//mini-css-extract-plugin の読み込み
const MiniCssExtractPlugin = require('mini-css-extract-plugin');
//optimize-css-assets-webpack-plugin の読み込み
const OptimizeCSSAssetsPlugin = require('optimize-css-assets-webpack-plugin');
//JavaScript の圧縮用のプラグイン TerserPlugin の読み込み
const TerserPlugin = require('terser-webpack-plugin');

module.exports = {
  entry: './src/index.js',
  output: {
    filename: 'main.js',
    path: path.resolve(__dirname, 'dist'),
  },
  //プラグインの設定
  plugins: [
    new MiniCssExtractPlugin({
      filename: 'style.css',
    }),
  ],
  //
  optimization: {
    //圧縮方法(圧縮に使うプラグイン)を変更
    minimizer: [
      //JavaScript 用の圧縮プラグイン
      new TerserPlugin({}),
      //CSS 用の圧縮プラグイン
      new OptimizeCSSAssetsPlugin({})
    ],
  },
  // ローダーの設定
  module: {
    rules: [
      {
        // CSS のローダー
        //ローダーの処理対象ファイル(拡張子 .css)
        test: /\.css$/i,
        use: [
          // CSSファイルを抽出するように MiniCssExtractPlugin のローダーを指定
          {
            loader: MiniCssExtractPlugin.loader,
          },
          // CSS を CommonJS に変換するローダー
          'css-loader',
        ],
      },

      //file-loader の設定
      {
        // 対象となるファイルの拡張子
        test: /\.(gif|png|jpe?g|svg)$/i,
        use: [
          {
            //画像を出力フォルダーにコピーするローダー
            loader: 'file-loader',
            options: {
              // 画像ファイルの名前とパスの設定
              name: './images/[name].[ext]'
            }
          }
        ],
      },

      {
        // Babel のローダー
        test: /\.(js|mjs|jsx)$/,
        exclude: /node_modules/,
        use: [
          {
            loader: 'babel-loader',
            options: {
              presets: [
                '@babel/preset-env',
                '@babel/preset-react',
              ]
            }
          }
        ]
      }
    ]
  },
  //webpack-dev-server の設定
  devServer: {
    //ルートディレクトリの指定
    contentBase: path.join(__dirname, 'dist'),
    //サーバー起動時にブラウザを自動的に起動
    open: true,
    // ルートディレクトリのファイルを監視
    watchContentBase: true,
    // ポート番号を変更
    port: 3000
  }
};
確認のため src フォルダ内に images フォルダを作成して画像(sample.jpg)を配置します。
style.css では背景画像を読み込むように設定し、文字色を変更して h1 要素を中央寄せにしてみます。
body {
  color: #FFF;
  background: url("images/sample.jpg") no-repeat center;
}
h1 {
  text-align: center;
}
以下を実行してファイルを開くと CSS が適用されていることが確認できます。
$ npm run build
または以下を実行して開発サーバを起動して確認することができます。
$ npm start
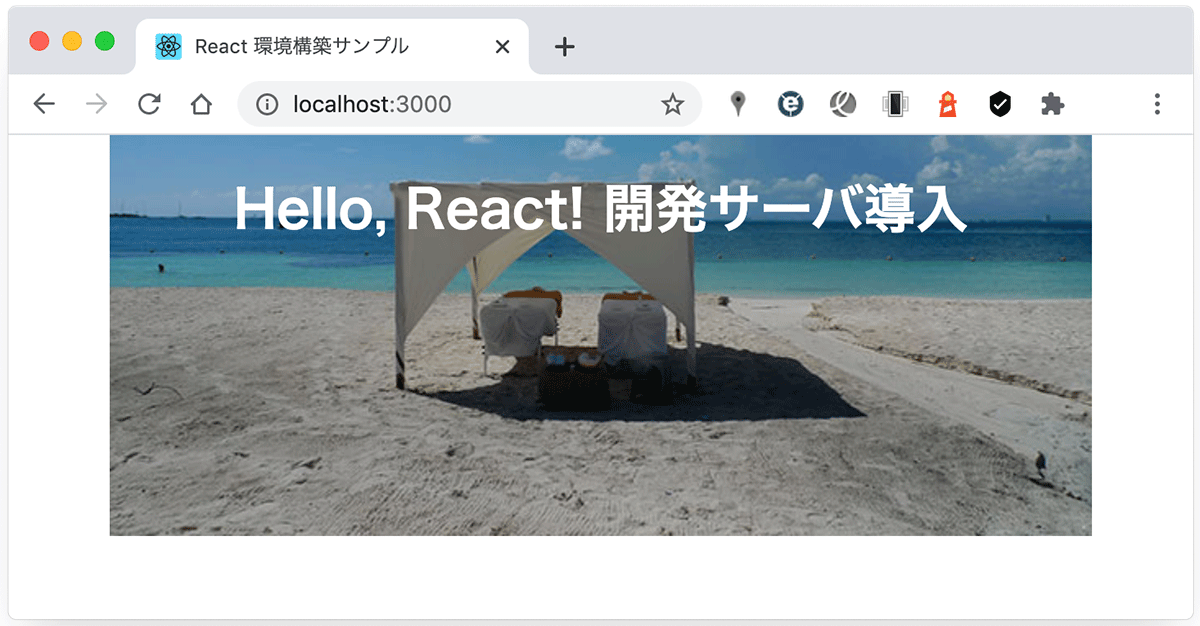
この時点でのファイル構成は以下のようになっています。ビルドせずに開発サーバを起動しただけでは、CSS の適用は確認できますが、画像はまだ書き出されていません(メモリ上にあるだけ)。画像を dist フォルダに出力するにはビルドする必要があります。
my-app2
├── dist
│   ├── images  // file-loader により出力されたフォルダと画像
│   │   └── sample.jpg
│   ├── index.html
│   ├── main.js
│   └── style.css
├── package-lock.json
├── package.json
├── src
│   ├── app.js
│   ├── images  //追加したフォルダと画像
│   │   └── sample.jpg
│   ├── index.js
│   └── style.css
└── webpack.config.js
sass-loader
sass-loader を使うと Sass を CSS へ変換する処理を追加することができます。
Sass ファイルを CSS に変換する sass-loader と Sass をコンパイルするための node-sass をインストールします。
$ npm install sass-loader node-sass --save-dev  return

+ node-sass@4.14.1
+ sass-loader@8.0.2
sass-loader の設定を webpack.config.js に追加します(46行目)。sass-loader → css-loader の順で処理される必要があるため、sass-loader を最後に追加します。
また、Sass ローダーの処理対象ファイルの拡張子を指定します(37行目)。.scss と .sass の他に .css も対象に指定しています。
const path = require('path');
//mini-css-extract-plugin の読み込み
const MiniCssExtractPlugin = require('mini-css-extract-plugin');
//optimize-css-assets-webpack-plugin の読み込み
const OptimizeCSSAssetsPlugin = require('optimize-css-assets-webpack-plugin');
//JavaScript の圧縮用のプラグイン TerserPlugin の読み込み
const TerserPlugin = require('terser-webpack-plugin');

module.exports = {
  entry: './src/index.js',
  output: {
    filename: 'main.js',
    path: path.resolve(__dirname, 'dist'),
  },
  //プラグインの設定
  plugins: [
    new MiniCssExtractPlugin({
      filename: 'style.css',
    }),
  ],
  //
  optimization: {
    //圧縮方法(圧縮に使うプラグイン)を変更
    minimizer: [
      //JavaScript 用の圧縮プラグイン
      new TerserPlugin({}),
      //CSS 用の圧縮プラグイン
      new OptimizeCSSAssetsPlugin({})
    ],
  },
  // ローダーの設定
  module: {
    rules: [
      {
        // Sass 用のローダー
        //ローダーの処理対象ファイル(拡張子 .scss .sass .css のファイル)
        test: /\.(scss|sass|css)$/i,
        use: [
          // CSSファイルを抽出するように MiniCssExtractPlugin のローダーを指定
          {
            loader: MiniCssExtractPlugin.loader,
          },
          // CSS を CommonJS に変換するローダー
          'css-loader',
          // Sass をコンパイルするローダー
          'sass-loader',
        ],
      },

      {
        // 対象となるファイルの拡張子
        test: /\.(gif|png|jpe?g|svg)$/i,
        use: [
          {
            //画像を出力フォルダーにコピーするローダー
            loader: 'file-loader',
            options: {
              // 画像ファイルの名前とパスの設定
              name: './images/[name].[ext]'
            }
          }
        ],
      },

      {
        // Babel のローダー
        test: /\.(js|mjs|jsx)$/,
        exclude: /node_modules/,
        use: [
          {
            loader: 'babel-loader',
            options: {
              presets: [
                '@babel/preset-env',
                '@babel/preset-react',
              ]
            }
          }
        ]
      }
    ]
  },
  //webpack-dev-server の設定
  devServer: {
    //ルートディレクトリの指定
    contentBase: path.join(__dirname, 'dist'),
    //サーバー起動時にブラウザを自動的に起動
    open: true,
    // ルートディレクトリのファイルを監視
    watchContentBase: true,
    // ポート番号を変更
    port: 3000
  }
};
確認のため以下のような Sass のファイル style.scss を作成して src フォルダに保存します。
Sass が変換されるのを確認するために変数を使って文字色を指定しています。
$body_color: #E1F374;

body {
  color: $body_color;
  background: url("images/sample.jpg") no-repeat center;
}
h1 {
  text-align: center;
}
src フォルダの index.js の CSS の読み込みを Sass の読み込みに変更します(CSS のままにして CSS を使うことも可能です)。
import React from 'react'
import ReactDOM from 'react-dom'
import App from './App'
import './style.scss'   //Sass を読み込む

const root = document.createElement('div');
root.setAttribute('id', 'root');
document.body.appendChild(root);

ReactDOM.render(
  <React.StrictMode>
    <App />
  </React.StrictMode>,
  document.getElementById('root')
);
以下を実行してファイルを開くと Sass が CSS に正しく変換されて適用されていることが確認できます。
$ npm run build
または以下を実行して開発サーバを起動して確認することができます。
$ npm start
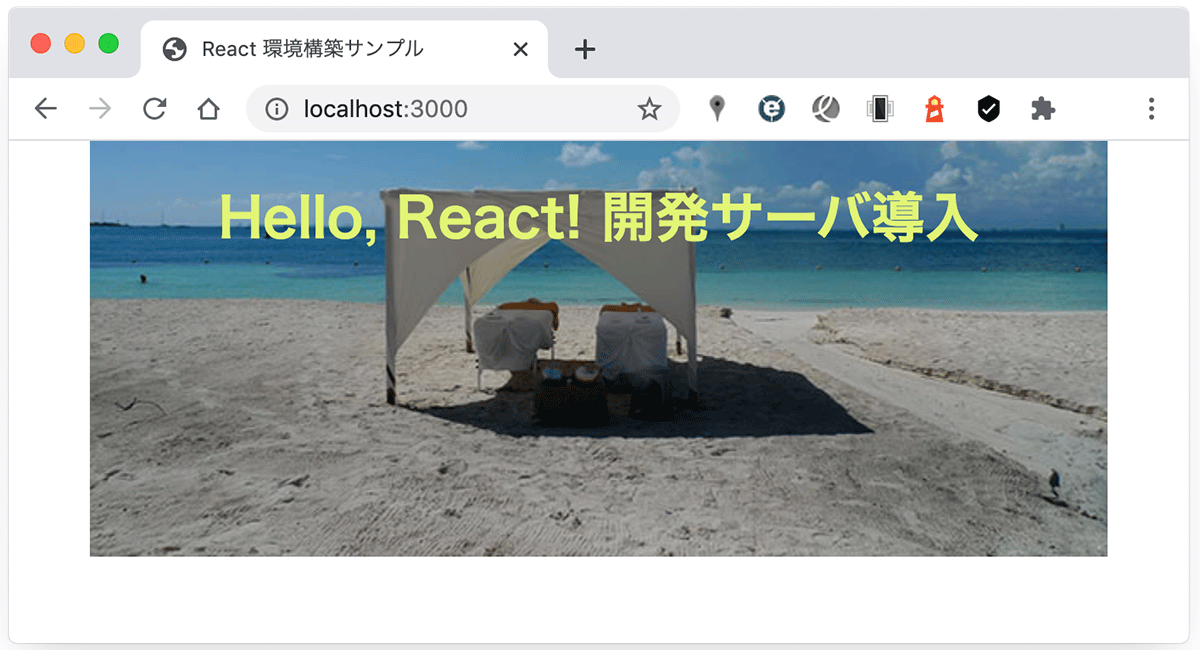
この時点でのファイル構成は以下のようになっています。
my-app2
├── dist
│   ├── images
│   │   └── sample.jpg
│   ├── index.html
│   ├── main.js
│   └── style.css  //Sass が CSS に変換されて出力される
├── package-lock.json
├── package.json
├── src
│   ├── app.js
│   ├── images
│   │   └── sample.jpg
│   ├── index.js  // style.scss を読み込むように変更
│   ├── style.css  // 未使用
│   └── style.scss  //追加した Sass ファイル
└── webpack.config.js
また、この時点での package.json は Sass 関連のパッケージが追加されて以下のようになっています。
{
  "name": "my-app2",
  "version": "1.0.0",
  "description": "",
  "main": "index.js",
  "private": true,
  "scripts": {
    "test": "echo \"Error: no test specified\" && exit 1",
    "build": "webpack --mode production",
    "dev": "webpack --mode development",
    "watch": "webpack --mode development --watch",
    "start": "webpack-dev-server"
  },
  "keywords": [],
  "author": "",
  "license": "ISC",
  "devDependencies": {
    "@babel/core": "^7.10.3",
    "@babel/preset-env": "^7.10.3",
    "@babel/preset-react": "^7.10.1",
    "babel-loader": "^8.1.0",
    "css-loader": "^3.6.0",
    "file-loader": "^6.0.0",
    "mini-css-extract-plugin": "^0.9.0",
    "node-sass": "^4.14.1",
    "optimize-css-assets-webpack-plugin": "^5.0.3",
    "react": "^16.13.1",
    "react-dom": "^16.13.1",
    "sass-loader": "^8.0.2",
    "webpack": "^4.43.0",
    "webpack-cli": "^3.3.12",
    "webpack-dev-server": "^3.11.0"
  }
}
html-webpack-plugin
html-webpack-plugin を使うと webpack でバンドルされた JavaScript や CSS を表示する HTML を自動的に生成することができます。
生成される HTML にはバンドルされた JavaScritp や CSS を読み込む script や link タグが自動的に埋め込まれています。
html-webpack-plugin をインストールします。
$ npm install --save-dev html-webpack-plugin   return
+ html-webpack-plugin@4.3.0
html-webpack-plugin の設定を webpack.config.js に追加します。
require() を使ってプラグイン html-webpack-plugin を読み込みます(3行目)
オプション hash: true を指定して webpack で生成される JavaScript や CSS のファイル名の最後にハッシュを追加しています(27行目)
また、<title> 要素の値を指定しています(25行目)。デフォルトは Webpack App です。
const path = require('path');
//html-webpack-plugin の読み込み
const HtmlWebpackPlugin = require('html-webpack-plugin');
//mini-css-extract-plugin の読み込み
const MiniCssExtractPlugin = require('mini-css-extract-plugin');
//optimize-css-assets-webpack-plugin の読み込み
const OptimizeCSSAssetsPlugin = require('optimize-css-assets-webpack-plugin');
//JavaScript の圧縮用のプラグイン TerserPlugin の読み込み
const TerserPlugin = require('terser-webpack-plugin');

module.exports = {
  entry: './src/index.js',
  output: {
    filename: 'main.js',
    path: path.resolve(__dirname, 'dist'),
  },
  //プラグインの設定
  plugins: [
    new MiniCssExtractPlugin({
      filename: 'style.css',
    }),
    //html-webpack-plugin の設定
    new HtmlWebpackPlugin({
      //<title> 要素を指定
      title: 'React 環境構築サンプル(最終版)',
      //ファイル末尾にハッシュを追加
      hash: true,
    }),
  ],
  //
  optimization: {
    //圧縮方法(圧縮に使うプラグイン)を変更
    minimizer: [
      //JavaScript 用の圧縮プラグイン
      new TerserPlugin({}),
      //CSS 用の圧縮プラグイン
      new OptimizeCSSAssetsPlugin({})
    ],
  },
  // ローダーの設定
  module: {
    rules: [
      {
        // Sass 用のローダー
        //ローダーの処理対象ファイル(拡張子 .scss .sass .css のファイル)
        //test: /\.s[ac]ss$/i,
        test: /\.(scss|sass|css)$/i,
        use: [
          // CSSファイルを抽出するように MiniCssExtractPlugin のローダーを指定
          {
            loader: MiniCssExtractPlugin.loader,
          },
          // CSS を CommonJS に変換するローダー
          'css-loader',
          // Sass をコンパイルするローダー
          'sass-loader',
        ],
      },

      {
        // 対象となるファイルの拡張子
        test: /\.(gif|png|jpe?g|svg)$/i,
        use: [
          {
            //画像を出力フォルダーにコピーするローダー
            loader: 'file-loader',
            options: {
              // 画像ファイルの名前とパスの設定
              name: './images/[name].[ext]'
            }
          }
        ],
      },

      {
        // Babel のローダー
        test: /\.(js|mjs|jsx)$/,
        exclude: /node_modules/,
        use: [
          {
            loader: 'babel-loader',
            options: {
              presets: [
                '@babel/preset-env',
                '@babel/preset-react',
              ]
            }
          }
        ]
      }
    ]
  },
  //webpack-dev-server の設定
  devServer: {
    //ルートディレクトリの指定
    contentBase: path.join(__dirname, 'dist'),
    //サーバー起動時にブラウザを自動的に起動
    open: true,
    // ルートディレクトリのファイルを監視
    watchContentBase: true,
    // ポート番号を変更
    port: 3000
  }
};
確認のため dist フォルダの中の index.html を削除します。
以下を実行してビルドすると dist フォルダの中に index.html が生成されていることが確認できます。開発サーバを起動しただけでは HTML の表示は確認できますが index.html は出力されません。
$ npm run build
デフォルトでは production モードでビルドすると、HTML はミニファイされます(オプションで minify:false を指定すればミニファイされません)。
以下を実行して development モードでビルドして HTML ファイルの内容を確認します。
$ npm run dev
自動的に style.css と main.js が読み込まれ、ファイル名の後にハッシュが追加されています。
<!DOCTYPE html>
<html>
  <head>
    <meta charset="utf-8">
    <title>React 環境構築サンプル(最終版)</title>
    <meta name="viewport" content="width=device-width, initial-scale=1">
    <link href="style.css?f39fb75e35fcc72be5a1" rel="stylesheet">
  </head>
  <body>
  <script src="main.js?f39fb75e35fcc72be5a1"></script></body>
</html>
最終的な package.json は以下のようになります。
{
  "name": "my-app2",
  "version": "1.0.0",
  "description": "",
  "main": "index.js",
  "private": true,
  "scripts": {
    "test": "echo \"Error: no test specified\" && exit 1",
    "build": "webpack --mode production",
    "dev": "webpack --mode development",
    "watch": "webpack --mode development --watch",
    "start": "webpack-dev-server"
  },
  "keywords": [],
  "author": "",
  "license": "ISC",
  "devDependencies": {
    "@babel/core": "^7.10.3",
    "@babel/preset-env": "^7.10.3",
    "@babel/preset-react": "^7.10.1",
    "babel-loader": "^8.1.0",
    "css-loader": "^3.6.0",
    "file-loader": "^6.0.0",
    "html-webpack-plugin": "^4.3.0",
    "mini-css-extract-plugin": "^0.9.0",
    "node-sass": "^4.14.1",
    "optimize-css-assets-webpack-plugin": "^5.0.3",
    "react": "^16.13.1",
    "react-dom": "^16.13.1",
    "sass-loader": "^8.0.2",
    "webpack": "^4.43.0",
    "webpack-cli": "^3.3.12",
    "webpack-dev-server": "^3.11.0"
  }
}
eslint-loader
ESLint は JavaScript の検証ツールです。
webpack で ESLint を使うには eslint-loader (ローダー)をインストールします。
eslint(本体)と eslint-loader 及び eslint-plugin-react(React 用のルール)をインストールします。
$ npm install --save-dev eslint eslint-loader eslint-plugin-react   return
+ eslint-loader@4.0.2
+ eslint@7.3.1
+ eslint-plugin-react@7.20.2
added 85 packages from 48 contributors and audited 1148 packages in 5.852s
以下は上記インストール後の package.json です。
{
  "name": "my-app2",
  "version": "1.0.0",
  "description": "",
  "main": "index.js",
  "private": true,
  "scripts": {
    "test": "echo \"Error: no test specified\" && exit 1",
    "build": "webpack --mode production",
    "dev": "webpack --mode development",
    "watch": "webpack --mode development --watch",
    "start": "webpack-dev-server"
  },
  "keywords": [],
  "author": "",
  "license": "ISC",
  "devDependencies": {
    "@babel/core": "^7.10.3",
    "@babel/preset-env": "^7.10.3",
    "@babel/preset-react": "^7.10.1",
    "babel-loader": "^8.1.0",
    "css-loader": "^3.6.0",
    "eslint": "^7.3.1",
    "eslint-loader": "^4.0.2",
    "eslint-plugin-react": "^7.20.2",
    "file-loader": "^6.0.0",
    "html-webpack-plugin": "^4.3.0",
    "mini-css-extract-plugin": "^0.9.0",
    "node-sass": "^4.14.1",
    "optimize-css-assets-webpack-plugin": "^5.0.3",
    "react": "^16.13.1",
    "react-dom": "^16.13.1",
    "sass-loader": "^8.0.2",
    "webpack": "^4.43.0",
    "webpack-cli": "^3.3.12",
    "webpack-dev-server": "^3.11.0"
  }
}
npx eslint --init コマンドで設定ファイルを生成するか、手動で設定ファイルを作成します。
以下はコマンドで設定ファイルを生成する例です。
対話形式で基本的な設定ファイルを作成することができ、React のオプションもあります。また、ファイル形式は JavaScript、YAML、JSON から選択することができます。
各質問に対する答えが表示されるので、矢印キーで選択して return で確定します。
$ npx eslint --init   return //設定ファイルを生成
? How would you like to use ESLint? …
  To check syntax only
❯ To check syntax and find problems  //選択
  To check syntax, find problems, and enforce code style
?What type of modules does your project use? …
❯ JavaScript modules (import/export)  //選択
  CommonJS (require/exports)
  None of these
? Which framework does your project use? …
❯ React  //選択
  Vue.js
  None of these
? Does your project use TypeScript? › No / Yes    //No を選択
? Where does your code run? …  (Press <space> to select, <a> to toggle all, <i> to invert selection)
✔ Browser  //選択
✔ Node
? What format do you want your config file to be in? …
❯ JavaScript  //選択
  YAML
  JSON
以下は上記の選択により生成された設定ファイル .eslintrc.js です。
必要に応じて内容を編集します(以下はサンプルです)。
module.exports = {
    "env": {
        "browser": true,
        "es2020": true
    },
    "extends": [
        "eslint:recommended",
        "plugin:react/recommended"
    ],
    "parserOptions": {
        "ecmaFeatures": {
            "jsx": true
        },
        "ecmaVersion": 11,
        "sourceType": "module"
    },
    "plugins": [
        "react"
    ],
    "rules": {
    }
};
この例では実際には以下を手動で作成して保存して使用しました。
個別のルールでは確認用にインデントやセミコロンの設定をエラー("error")になるようにしていますが、実際に使用する場合は適宜変更します("error" にするとルールに適合しない場合、エラーとなりコンパイルされません。"warn" にすると警告が表示されますがコンパイルされます)。
個別のルールの設定では "error" の代わりに 2 を、"warn" の代わりに 1 を、"off" の代わりに 0 を指定しても同じです。
[追記] props の値に対して PropTypes を指定していない場合に警告になるのをオフにするルール react/prop-types (42行目)を追加しています。
{
  //JSON ファイルですが1行コメントが使えます
  //環境設定
  "env": {
    //ブラウザで実行されるコードを検証
    "browser": true,
    //ES6 で書かれたコードを検証
    "es6": true
  },
  //プラグインが提供する推奨設定を指定
  "extends": [
    //ESLint が推奨するテスト項目(ルール)
    "eslint:recommended",
    // eslint-plugin-react が推奨するテスト項目(ルール)
    "plugin:react/recommended"
  ],
  "parserOptions": {
    //追加の言語機能
    "ecmaFeatures": {
      "jsx": true
    },
    //ES Modules 機能を有効にする
    "sourceType": "module"
  },
  //使用するプラグイン
  "plugins": [
    "react"
  ],
  //使用するプラグインのバージョンを自動検出する(指定いないとWarinigが出る)
  "settings": {
    "react": {
      "version": "detect"
    }
  },
  //個別のルールの指定
  "rules": {
    //React が未使用として誤ってマークされるのを防止(警告にする)
    "react/jsx-uses-react": "warn",
    //JSXで使用される変数が未使用として誤ってマークされるのを防止(警告にする)
    "react/jsx-uses-vars": "warn",
    //props の値に対して PropTypes を指定していない場合に警告になるのをオフにする
    "react/prop-types": "off",
    //インデントはスペース2つ
    "indent": [
      "error",
      2
    ],
    //セミコロンを必ず付ける
    "semi": [
      "error",
      "always"
    ]
  }
}
[追記] babel-plugin-transform-class-properties と babel-eslint をインストールしている場合は、babel-eslint をパーサに指定します。
ESLint 標準のパーサでは非標準仕様の場合エラーになってしまうので、babel-eslint を使います。
また、以下の例では error 'props' is defined but never used のような no-unused-vars のエラーを表示しないように "no-unused-vars": "off" も追加しています。但し、指摘されている未使用の変数を削除すれば良いので実際にはこのルールは追加しない方が良いかもしれません。
{
  //babel-eslint をパーサに指定(追加)
  "parser": "babel-eslint",

  ・・・以下前述の .eslintrc.json と同じ・・・
  //環境設定
  "env": {
    //ブラウザで実行されるコードを検証
    "browser": true,
    //ES6)で書かれたコードを検証
    "es6": true
  },

  ・・・中略・・・

  //個別のルールの指定
  "rules": {
    "react/jsx-uses-react": "warn",
    "react/jsx-uses-vars": "warn",
    "react/prop-types": "off",
    //eslint 全体で no-unused-vars のチェックをオフ
    "no-unused-vars": "off",
    "indent": [
      "error",
      2
    ],
    "semi": [
      "error",
      "always"
    ]
  }
}
}
webpack.config.js に ESLint 関連の設定を追加します(43〜57行目)。
enforce: 'pre' を指定して babel-loader で変換する前にコード検証するようにします(47行目)。
fix: true を指定すると可能な場合は自動的に修正することができます(53行目)。
const path = require('path');
//html-webpack-plugin の読み込み
const HtmlWebpackPlugin = require('html-webpack-plugin');
//mini-css-extract-plugin の読み込み
const MiniCssExtractPlugin = require('mini-css-extract-plugin');
//optimize-css-assets-webpack-plugin の読み込み
const OptimizeCSSAssetsPlugin = require('optimize-css-assets-webpack-plugin');
//JavaScript の圧縮用のプラグイン TerserPlugin の読み込み
const TerserPlugin = require('terser-webpack-plugin');

module.exports = {
  entry: './src/index.js',
  output: {
    filename: 'main.js',
    path: path.resolve(__dirname, 'dist'),
  },
  //プラグインの設定
  plugins: [
    new MiniCssExtractPlugin({
      filename: 'style.css',
    }),
    //html-webpack-plugin の設定
    new HtmlWebpackPlugin({
      //<title> 要素を指定
      title: 'React 環境構築サンプル(最終版)',
      //ファイル末尾にハッシュを追加
      hash: true,
    }),
  ],
  //
  optimization: {
    //圧縮方法(圧縮に使うプラグイン)を変更
    minimizer: [
      //JavaScript 用の圧縮プラグイン
      new TerserPlugin({}),
      //CSS 用の圧縮プラグイン
      new OptimizeCSSAssetsPlugin({})
    ],
  },
  // ローダーの設定
  module: {
    rules: [
      {
        // ESLint のローダー
        test: /\.(js|mjs|jsx)$/,
        //not modified by other loaders like babel-loader
        enforce: 'pre',
        exclude: /node_modules/,
        use: [
          {
            loader: 'eslint-loader',
            options: {
              //fix: true,
            },
          },
        ],
      },

      {
        // Sass 用のローダー
        //ローダーの処理対象ファイル(拡張子 .scss .sass .css のファイル)
        //test: /\.s[ac]ss$/i,
        test: /\.(scss|sass|css)$/i,
        use: [
          // CSSファイルを抽出するように MiniCssExtractPlugin のローダーを指定
          {
            loader: MiniCssExtractPlugin.loader,
          },
          // CSS を CommonJS に変換するローダー
          'css-loader',
          // Sass をコンパイルするローダー
          'sass-loader',
        ],
      },

      {
        // 対象となるファイルの拡張子
        test: /\.(gif|png|jpe?g|svg)$/i,
        use: [
          {
            //画像を出力フォルダーにコピーするローダー
            loader: 'file-loader',
            options: {
              // 画像ファイルの名前とパスの設定
              name: './images/[name].[ext]'
            }
          }
        ],
      },

      {
        // Babel のローダー
        test: /\.(js|mjs|jsx)$/,
        exclude: /node_modules/,
        use: [
          {
            loader: 'babel-loader',
            options: {
              presets: [
                '@babel/preset-env',
                '@babel/preset-react',
              ]
            }
          }
        ]
      }
    ]
  },
  //webpack-dev-server の設定
  devServer: {
    //ルートディレクトリの指定
    contentBase: path.join(__dirname, 'dist'),
    //サーバー起動時にブラウザを自動的に起動
    open: true,
    // ルートディレクトリのファイルを監視
    watchContentBase: true,
    // ポート番号を変更
    port: 3000
  }
};
例えば、src/index.js でセミコロンが1箇所抜けていて、インデントが1箇所スペース4つになっている場合に、ビルドを実行したり開発サーバを起動しているとターミナルに以下のようなエラーが表示されます。
実際にはエラーの部分は赤字で表示されます。
$ npm run build  return

> my-app2@1.0.0 build /Applications/MAMP/htdocs/samples/test
> webpack --mode production

Hash: 001863a8e3776061c442
Version: webpack 4.43.0
Time: 1455ms
Built at: 2020/06/30 16:28:35
 1 asset
Entrypoint main = main.js
[3] ./src/index.js 303 bytes {0} [built] [1 error]
    + 7 hidden modules

ERROR in ./src/index.js //エラー
Module Error (from ./node_modules/eslint-loader/dist/cjs.js):

/Applications/MAMP/htdocs/samples/test/src/index.js
   4:43  error  Missing semicolon                             semi  //セミコロン
  12:1   error  Expected indentation of 2 spaces but found 4  indent  //インデント

✖ 2 problems (2 errors, 0 warnings)
  2 errors and 0 warnings potentially fixable with the `--fix` option.

・・・以下省略・・・
webpack.config.js で options の fix: true を設定すると特定の誤り(ESLint のルールの一覧ページでレンチのアイコンがついているルール)はビルドの際に自動的に修正されます。
webpack : eslint-loader
ESLint : Getting Started
ESLint : Configuring ESLint
ESLint : Rules
plugin : eslint-plugin-react
プロジェクトのコピー
既存のプロジェクトで作成された package.json を新たなプロジェクトのルートディレクトリに配置して、パッケージ名を指定せずにインストールコマンドを実行すれば同じパッケージで構成されるプロジェクトを複製することができます。
但し、インストールされるパッケージのバージョンは package.json に記述されたものとは限らず、その時点での同じメジャーバージョンの最新版がインストールされます。
例えば、my-app3 という新しいフォルダを作成し、そのフォルダに前述の package.json や webpack.config.js、.eslintrc.json 及び src フォルダの中身をコピーして以下を実行すると同じ内容のプロジェクトが簡単に作成できます。
$ npm install  return
//package.json に記載されている全てのパッケージがインストールされる

・・・中略・・・

added 1073 packages from 535 contributors and audited 1073 packages in 37.904s
関連項目:プロジェクトの複製・コピー